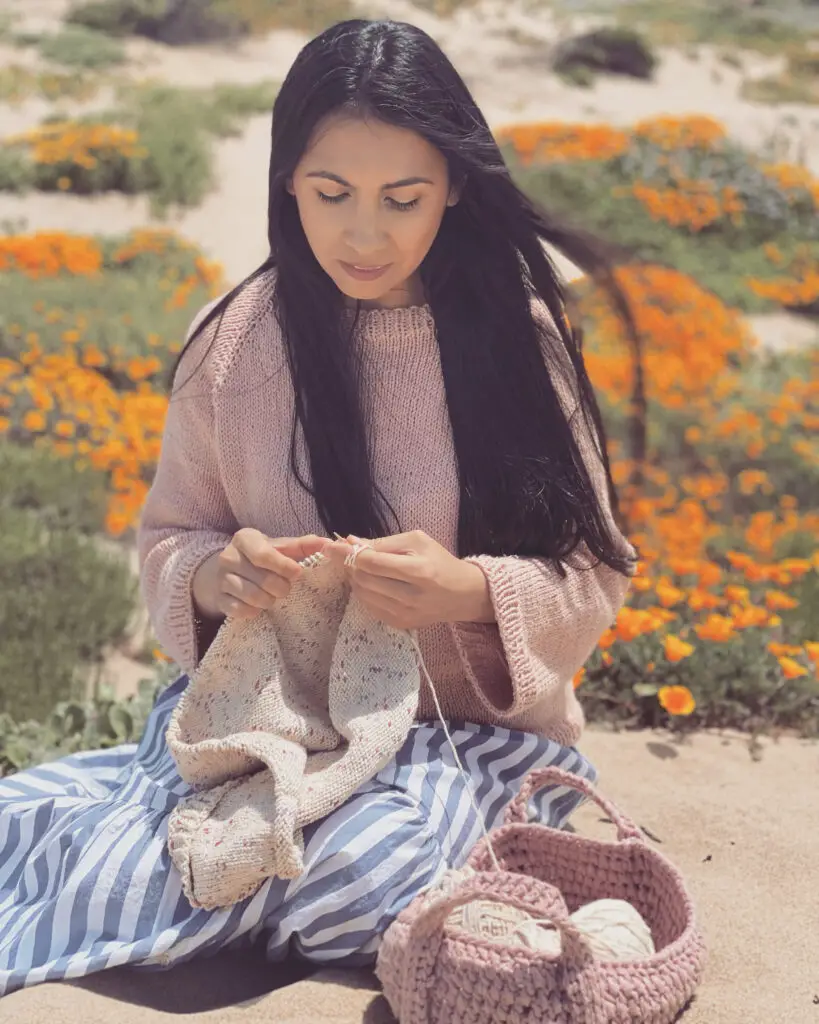
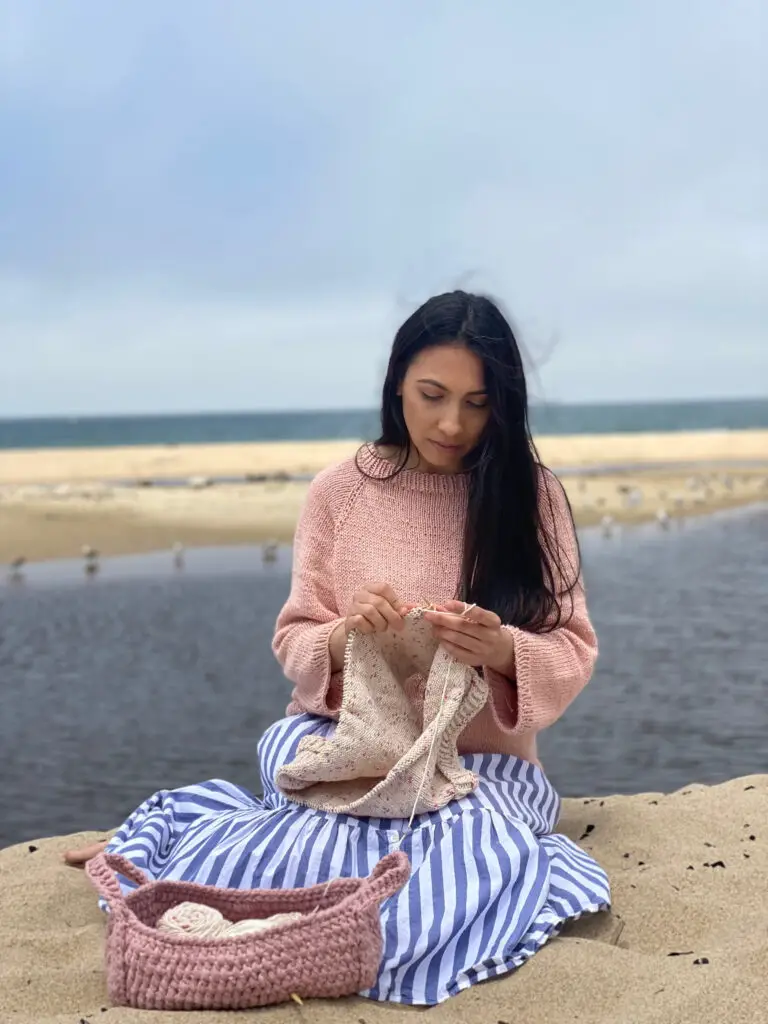
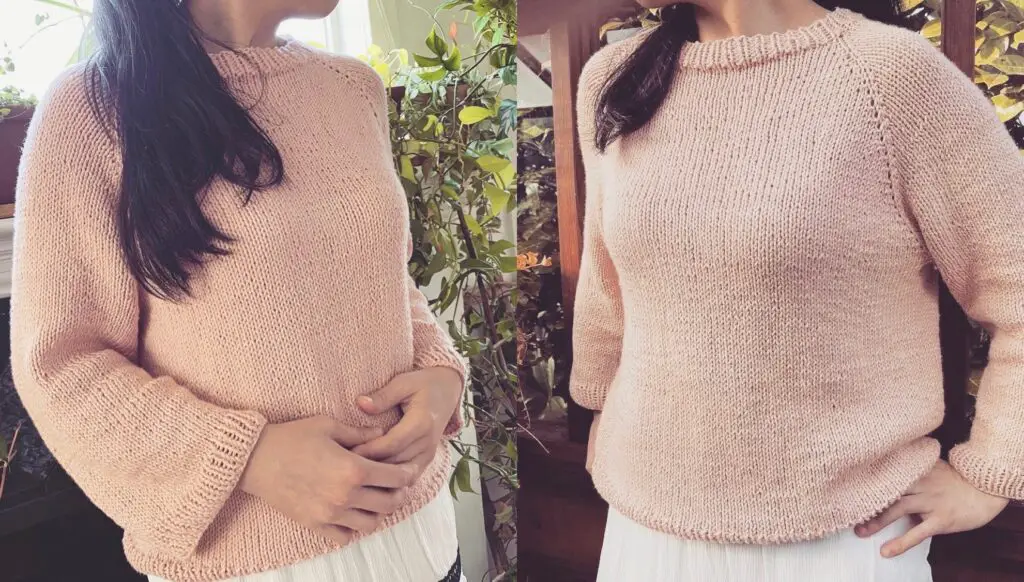
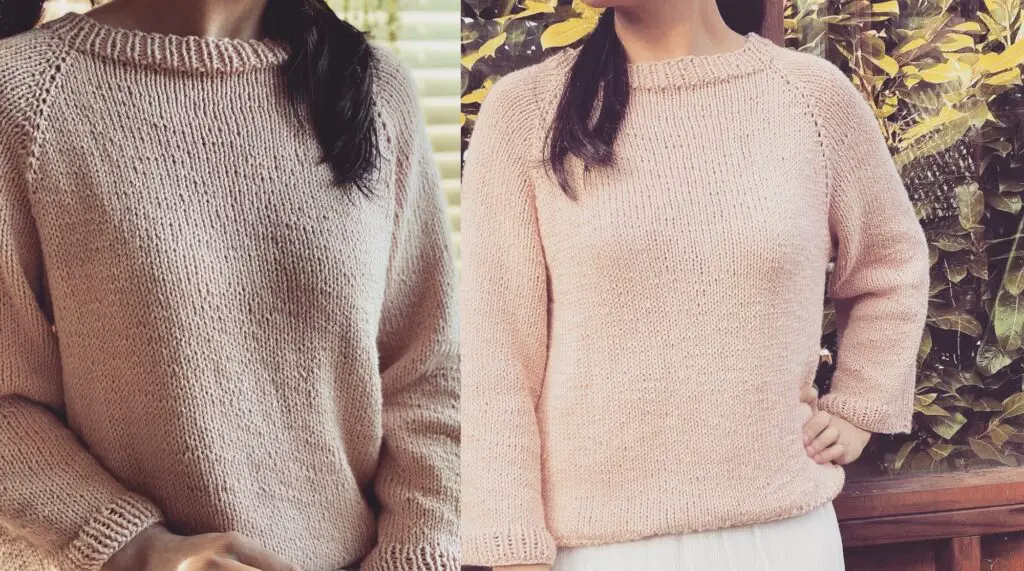
Hi Everyone! If you know the basics of knitting, you should definitely consider making this item. I would say that this sweater is beginner friendly. If you know how to knit and purl, you can do it. The increases are done with the knit front and back method, which I think is also the easiest. I have also added a video tutorial for people who like to visually see what they are learning. The written detailed instructions are below. (The tutorial is for 5 sizes (XS, S, M, L, XL). Hope you like it.

Abbreviations:
CO: Cast on
BO: Bind Off
K: Knit
P: Purl
ST (S): Stitch (es)
REP: Repeat
KFB: Knit Front/Back
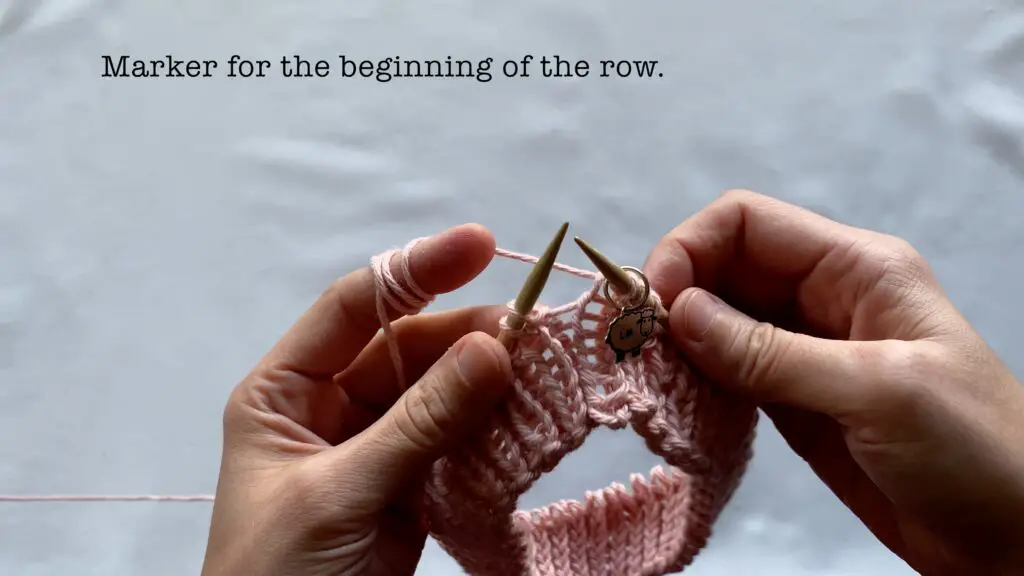
Marker: M
SM: Stitch Marker
Materials:
100 % medium weight cotton yarn. https://amzn.to/3P98i9a
Circular needle size 5.5 mm. https://amzn.to/3N3LLHR I used the 16 inches cord (for the arms and the neck), and 36 inches cord (for the body).
YARN SUBSTITUTIONS:
https://amzn.to/3NkZ9sz. Pima cotton yarn from Lion Brand. This yarn is one of my favorites. It’s a 100 % Pima cotton yarn, luxurious and very soft . This is a great yarn option for someone who likes to crochet or knit with soft yarn. When you crochet with this yarn, it flows very easily and comfortably. I very much recommend this yarn for making sweaters, summer tops, dresses, etc.
https://amzn.to/45VLq2B Dishie yarn by Knit Picks is also great option. It’s also very soft, and very easy to crochet or knit. I have used this yarn so many times and love it. It’s also a 100% cotton yarn, and it is also reasonably priced.
https://amzn.to/43x4Qt3 Wool of the Andes by Knit Picks is also a great option for sweaters. It is worsted weight 100% Peruvian Highland Wool yarn, and the wool is very durable (wool that is cared for and not abused can last for many years). It’s very soft to the touch and is of course also warm to wear. I love knitting with it.
NOTIONS:
Yarn Needle
Stitch Markers
Waste Yarn
Notes:
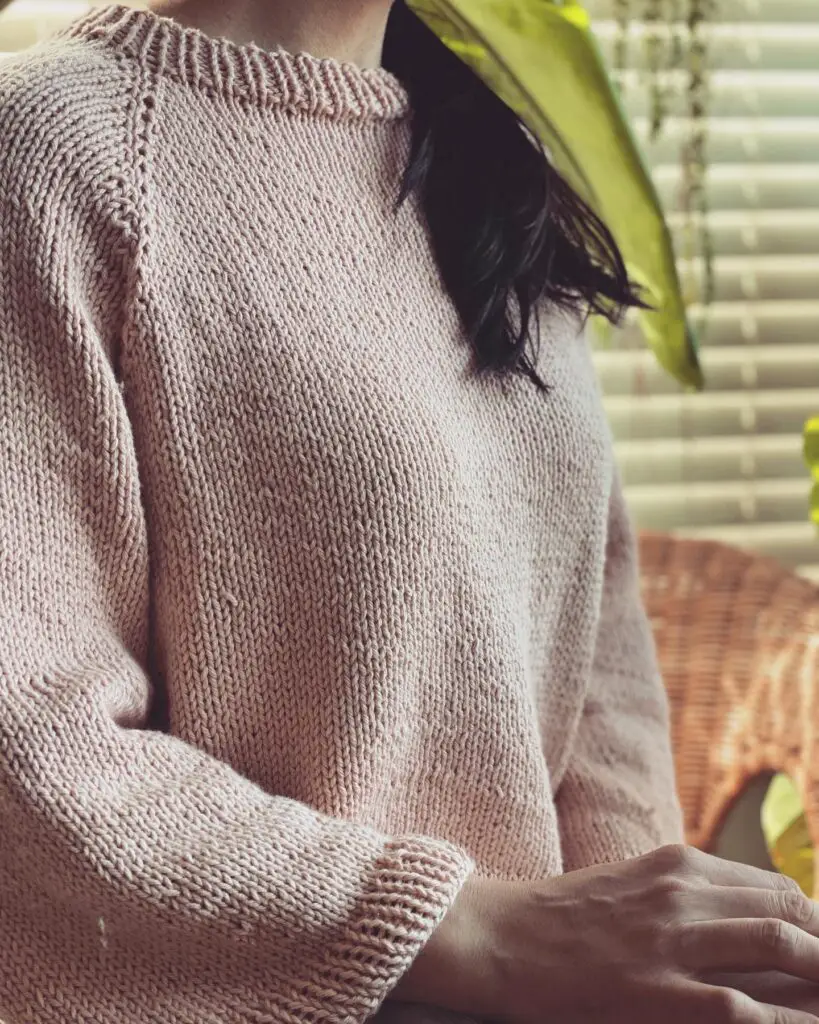
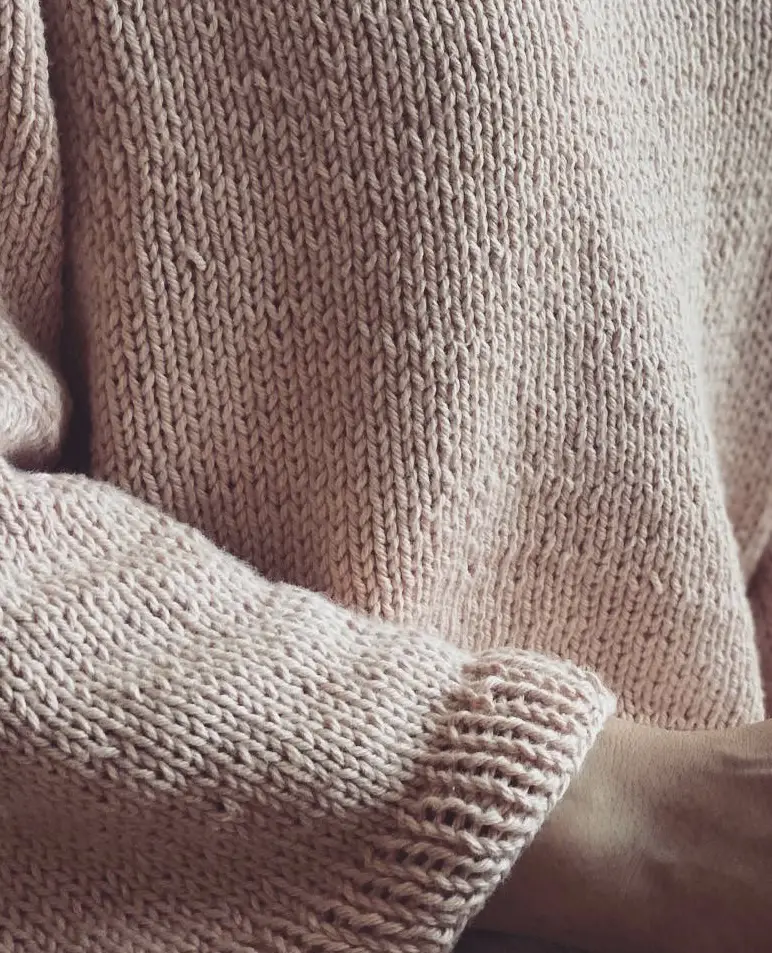
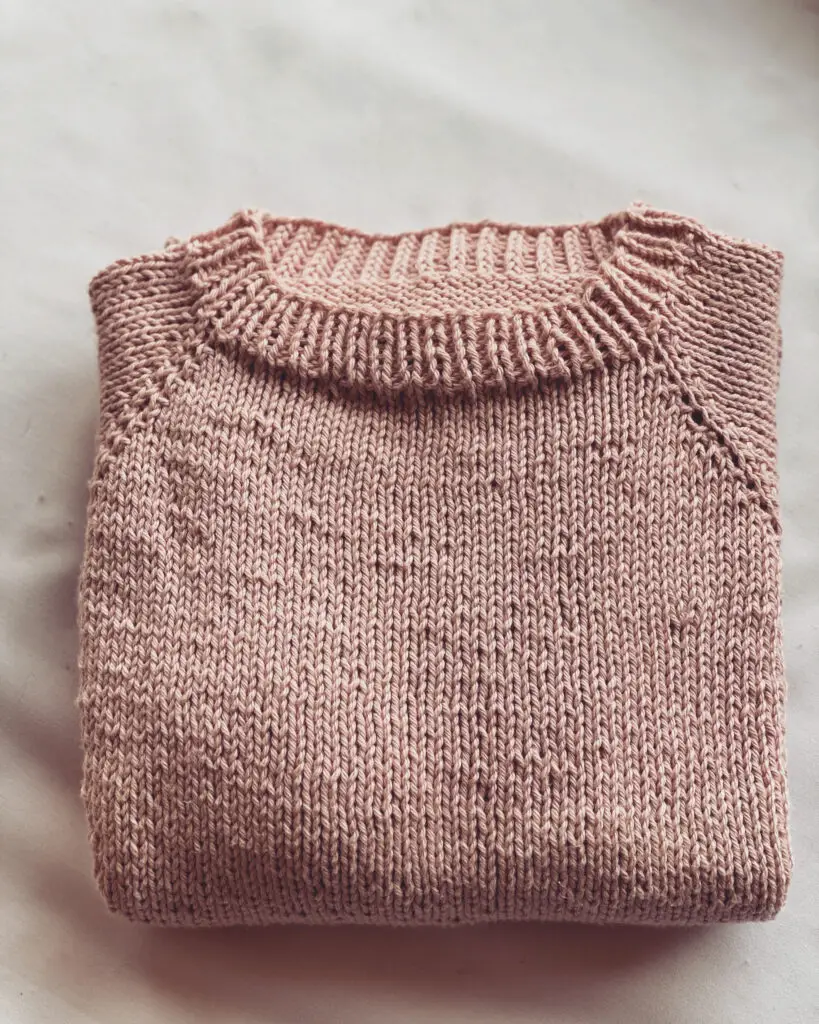
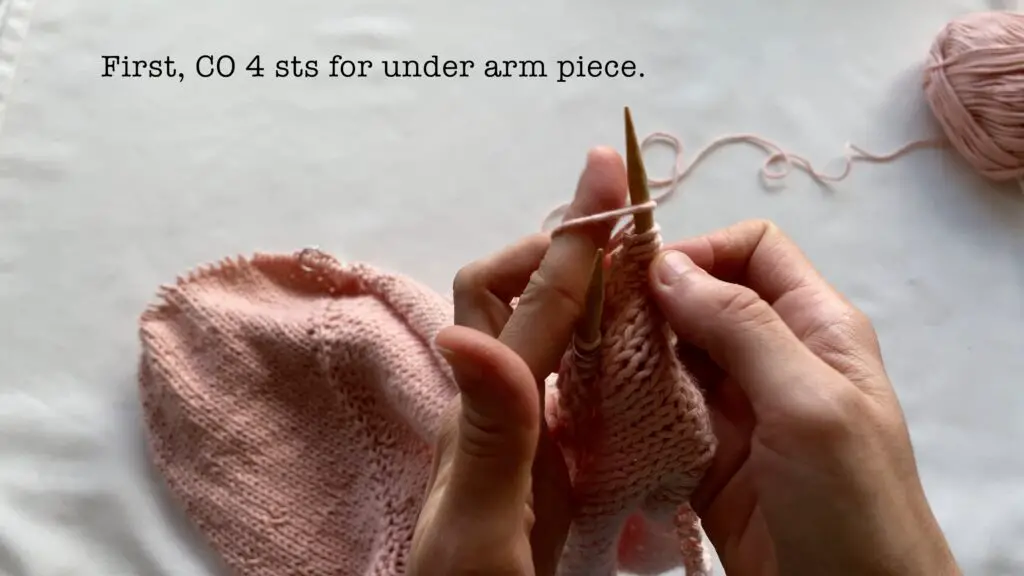
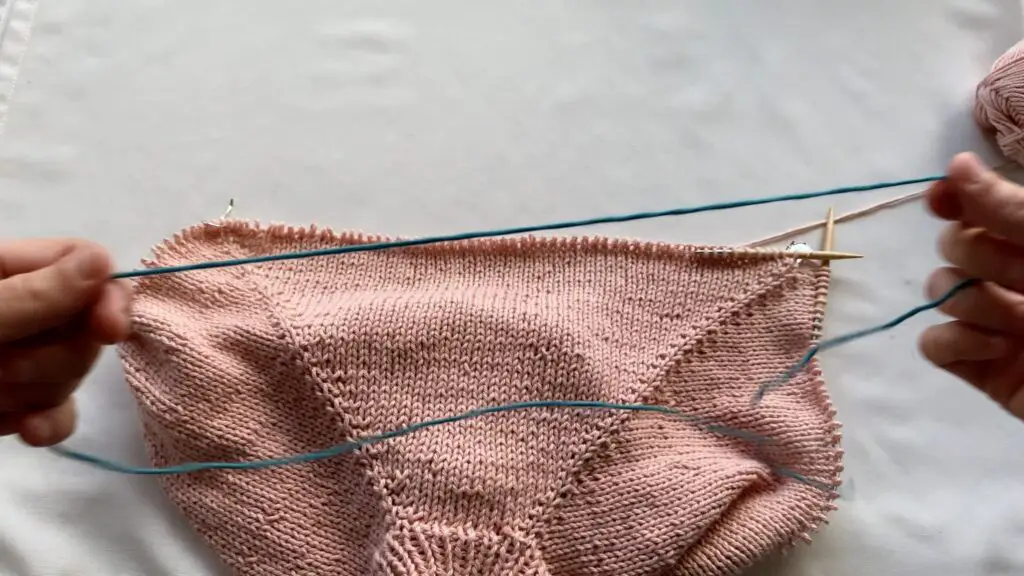
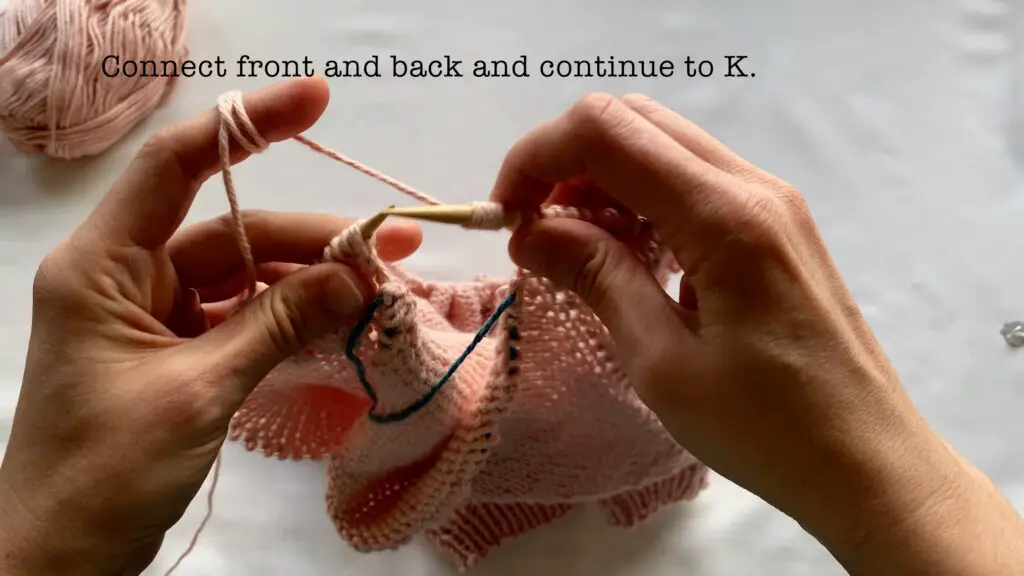
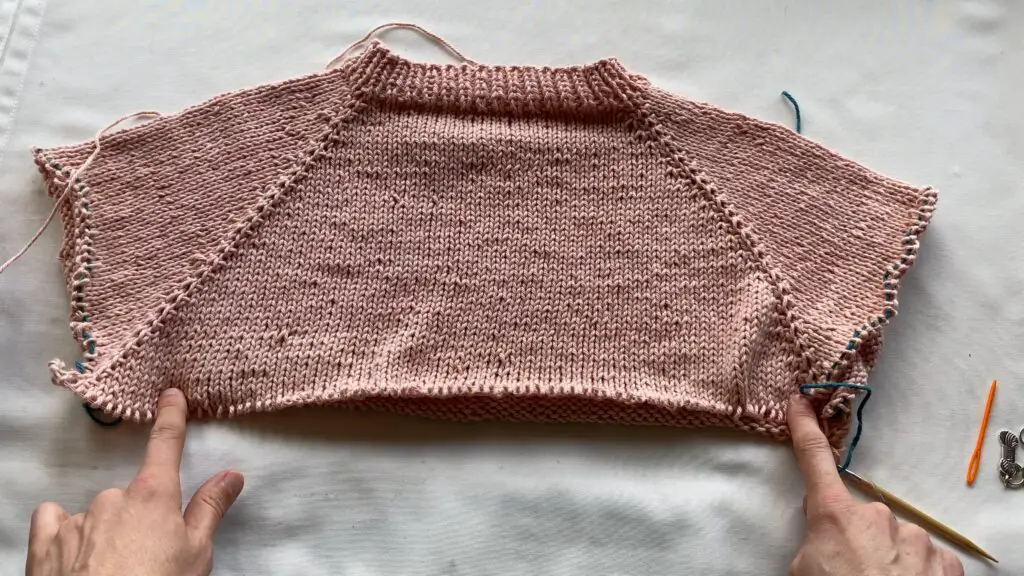
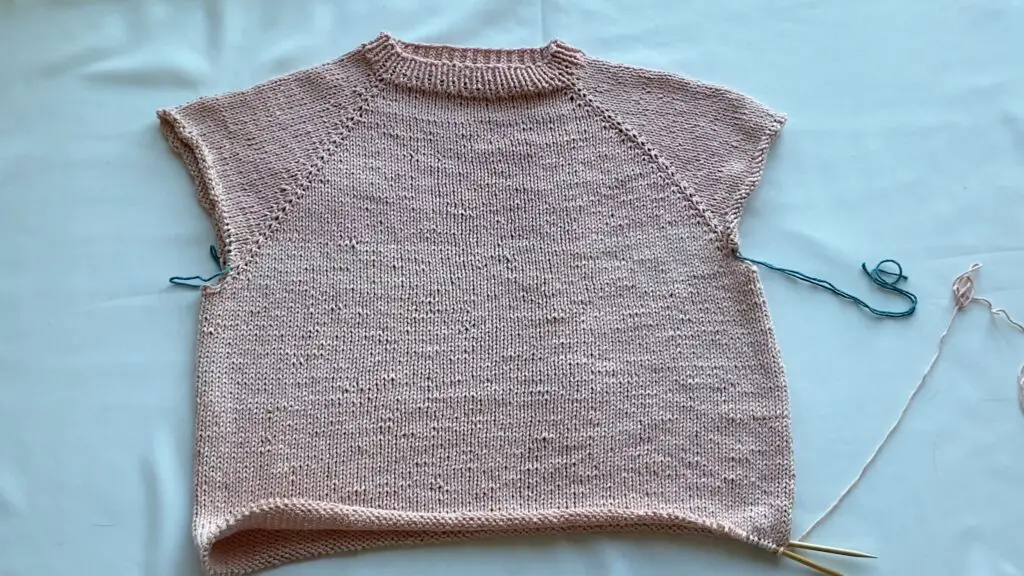
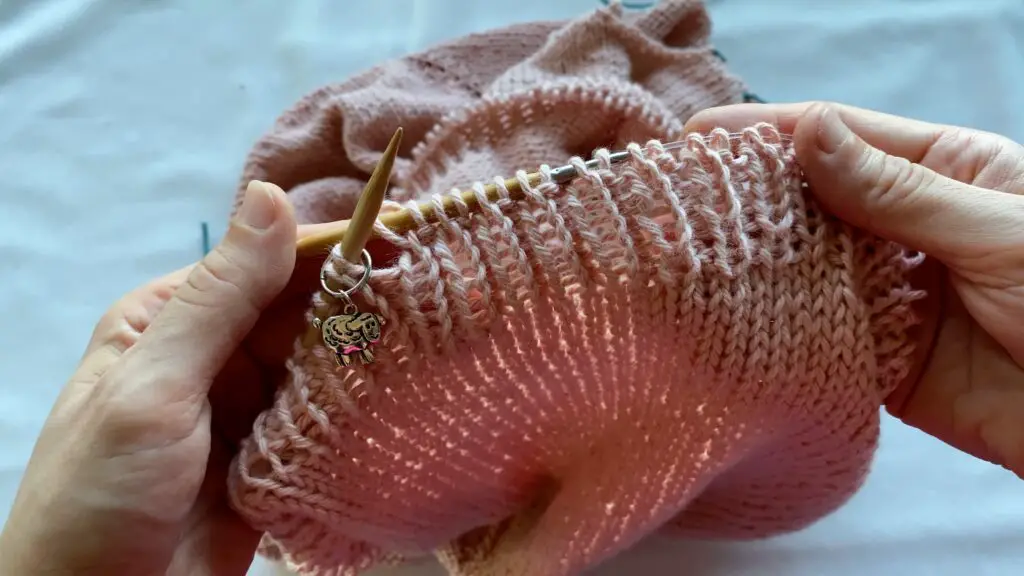
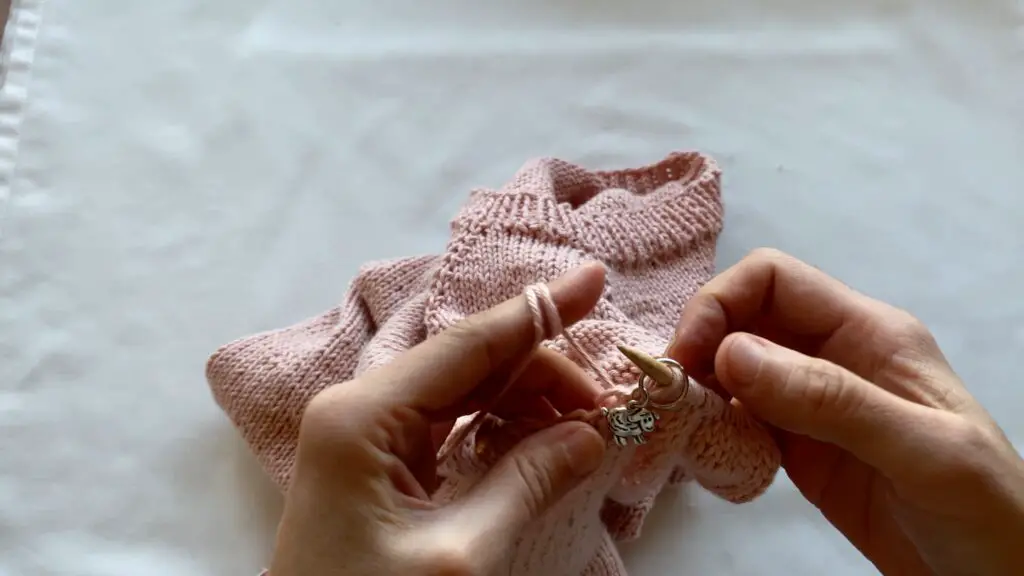
This sweater was easy and enjoyable to make. It is worked in the round, from the top down, and the sleeves are done by picking up stitches. Increases are done every other row until you reach the armpit, where a piece of “waste yarn” or “scrap yarn” is used (see photo below). Continue knitting in the round for the body piece until you have the desired length. Stitch is knit stitch for the body piece/ sleeves, and the ribbing is done with knit stitch followed by purl stitch. Written detailed instructions are below.
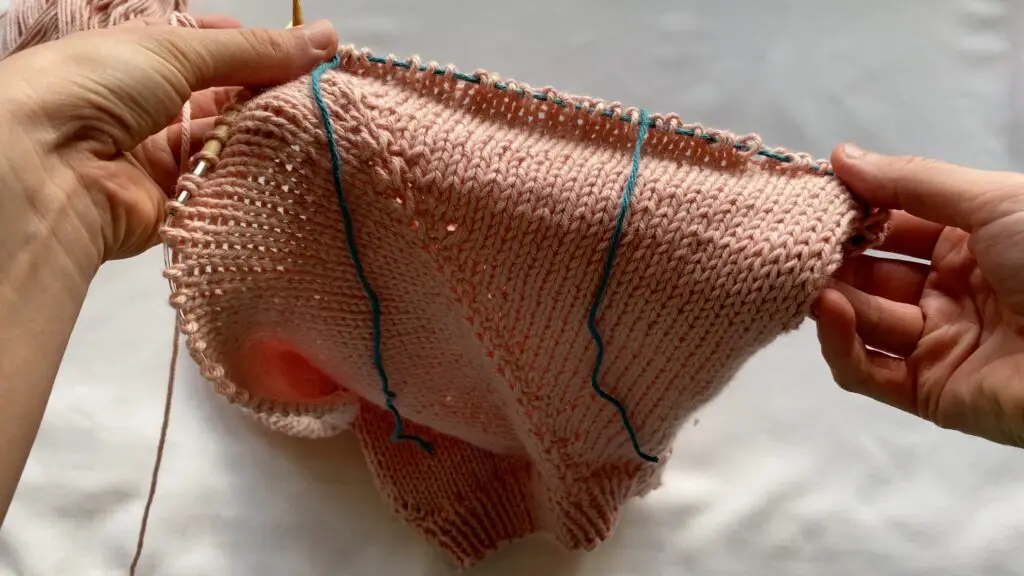
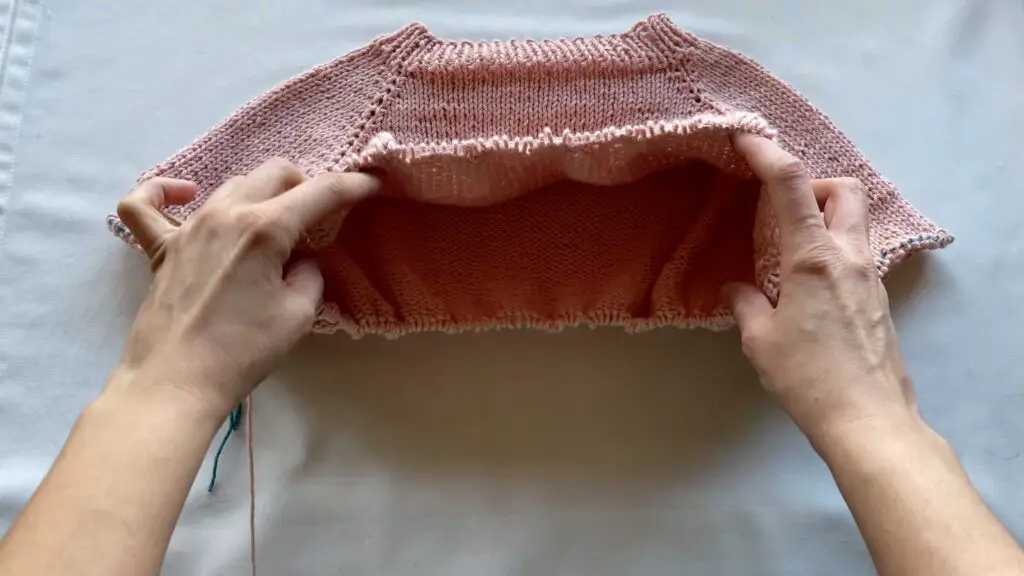
***NOTE: The term “waste yarn” or “scrap yarn” can easily confuse someone who is new to knitting, because it sounds like pieces of yarn that you are discarding. But in knitting “waste yarn” or “scrap yarn” has become the name for a piece of yarn that is used to temporarily mark your location and, very important, to also keep the loops of yarn securely in place, preventing the loops from either closing or unraveling, until you are ready to connect the two knitted sections together. The waste yarn needs to be a different color than your project, in order to make it easy to see, and it should also be roughly the same size yarn as your project.
Gauge:
17 sts and 22 rows = 4″ [10 cm] in
knitting st with 5.5 mm needles.
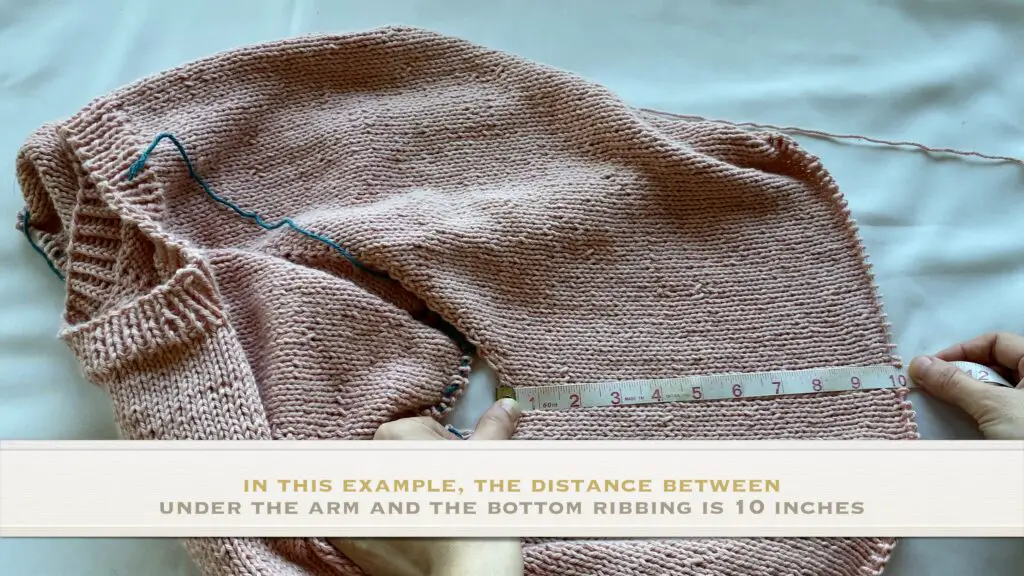
NOTE: The measurements are done between the different sizes and also the gauge. I suggest using your sweater as a template, or carefully measure your own body. The good thing about knitting top down is that you can check often the sweater’s fit especially when you come to the part (connecting the armhole pieces), you can wear the sweater and check the fit. Make sure to check the size early and often while you are knitting.
Written Instructions:
XS, (S, M, L, XL)
With 5.5 mm needles, CO 69 (73, 79, 83, 89)
Row 1: K1, P1. Rep from until the end of the row.
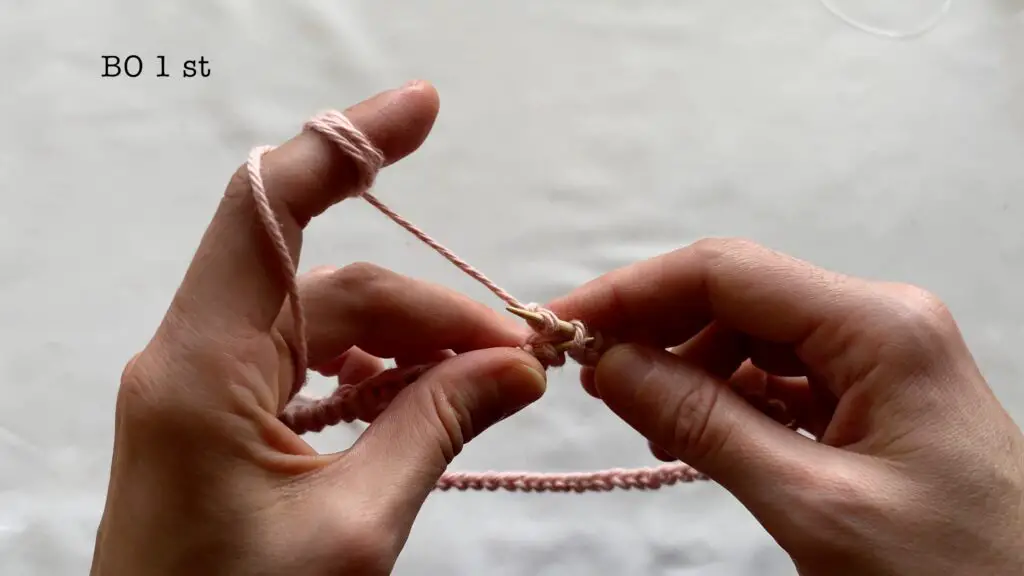
While connecting the circle, we’ll bind off one st. 68 (72,78, 82, 88)
Rows 1-8: K1, P1. Rep from until the end of the row.
Row 9: K for the next 9 (9, 9 11, 11) sts and place a marker (shoulder part); K for next 25 (27, 30, 30, 33) sts and place a marker (front piece) K for the next 9 (9, 9 11, 11) sts and place a marker (shoulder part); K for next 25 (27, 30, 30, 33) sts. (No need to place marker here because we have beginner stitch marker in place.
Row 10: [K to M, KFB, SM, KFB, K to M,] 4x, k to end of row. (76, 80, 86, 90, 96) sts.
Row 11: K to all sts. (No increase this row.) (76, 80, 86, 90, 96) sts.
Repeat rounds 10-11 until the desired length. (Please check your own measurements before pursuing.)
THE BOTTOM RIBBING: *K1, P1. REP from * UNTIL THE END. (FOR 7 ROWS)
After done with ribbing, BO all sts.

Continue knitting in circle until desired arm length and make the ribbing same as bottom ribbing.
Leave a Reply