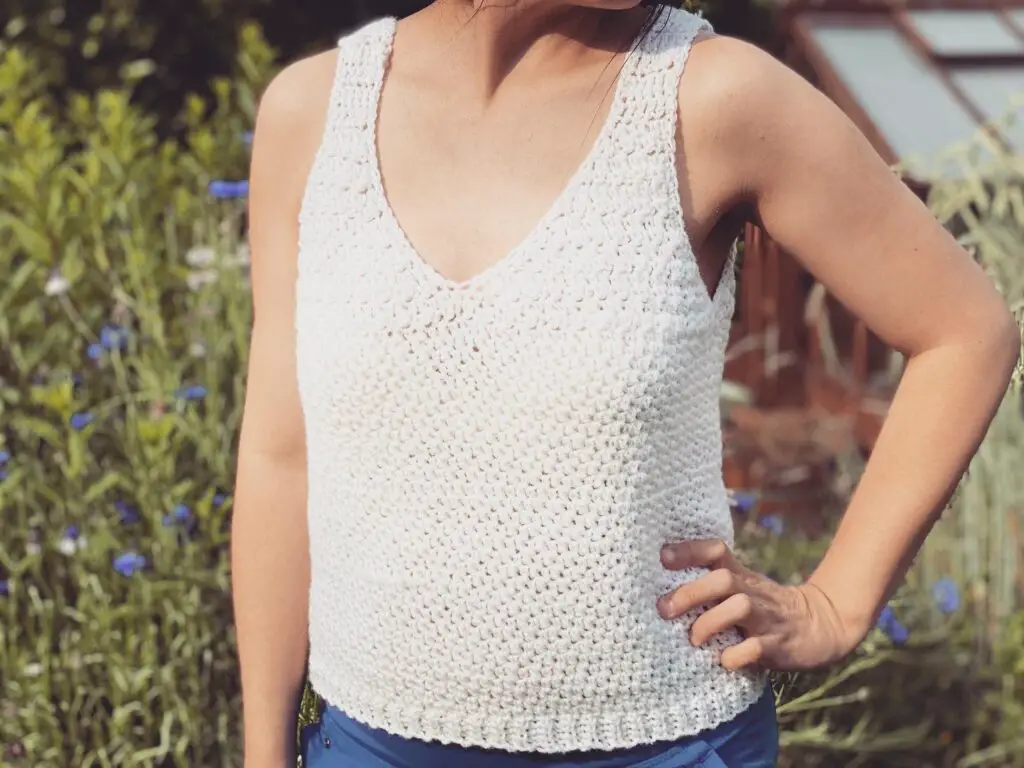
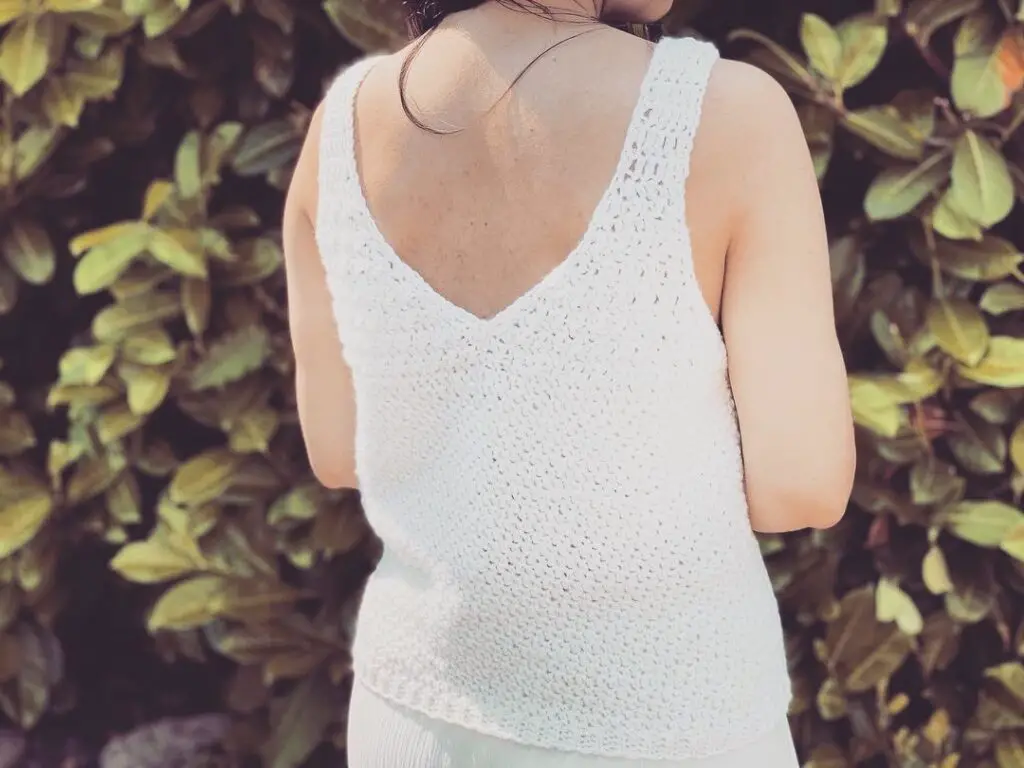
This is very soft, light weight, very elegant looking summer top. It’s made with wool yarn Total of 4.5 skein of yarn used for XS/S size and it took less than a day to make it. You can try with different colors or multicolors. You can even make it longer as a dress. I think that would look nice too. Written instructions and the materials in below.


Materials
The yarn I used to make this sweater, https://amzn.to/46lmhyG
Crochet hook 5 mm, https://amzn.to/3COohSz
Scissors
Tapestry needle
I’ve listed some of my favorite yarns below that would be great option to make this sweater.
YARN SUBSTITUTIONS:
https://amzn.to/3CPoJjk Pima cotton yarn from Lion Brand. I think this yarn would be an cotton option for this sweater. It’s also very soft and lightweight. It’s a 100 % Pima cotton yarn, luxurious and extremely soft. When you crochet with this yarn, it flows very easily and comfortably. It’s also reasonably priced. I very much recommend this yarn.
https://amzn.to/3PwL9gV I also love Dishie yarn by Knit Picks. This yarn also would be an another cotton option for this sweater. Its also very soft, and very easy to crochet or knit. I have used this yarn many times and loved it. This would be a great option! It’s also a Worsted Weight 100% Cotton Yarn.
Abbreviations
Ch: Chain
Sc: Single crochet
Dc: Double crochet
St (s): Stitch (es)
Sl st: Slip stitch
SM: Stitch Marker
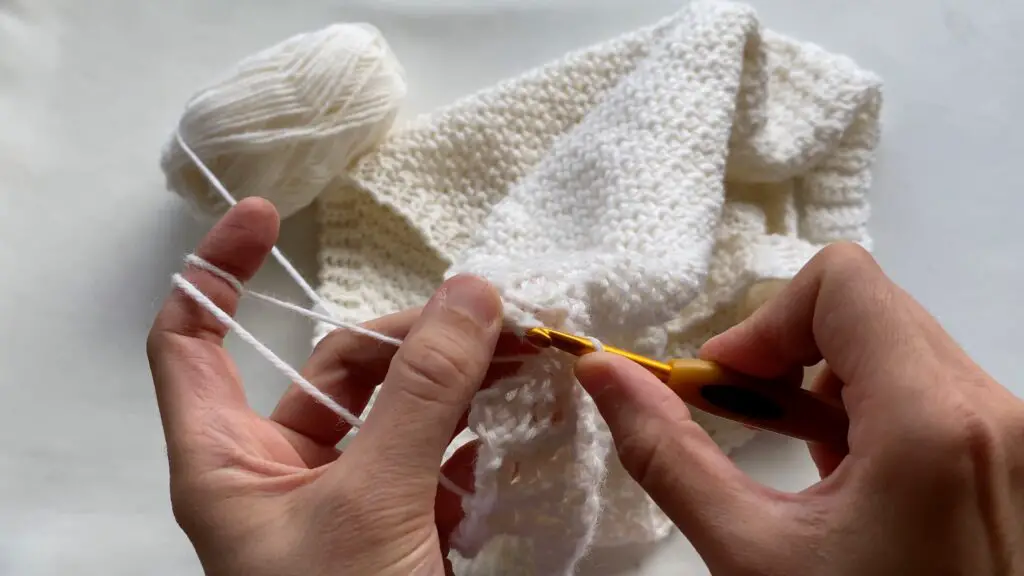
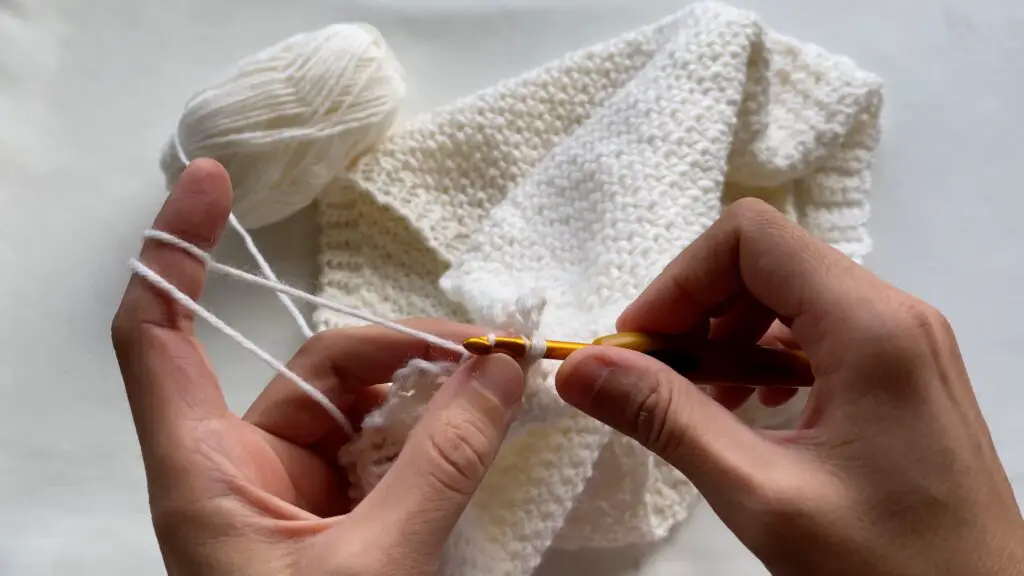
Written Instructions: The written instructions and the video tutorial is made for size XS/S.
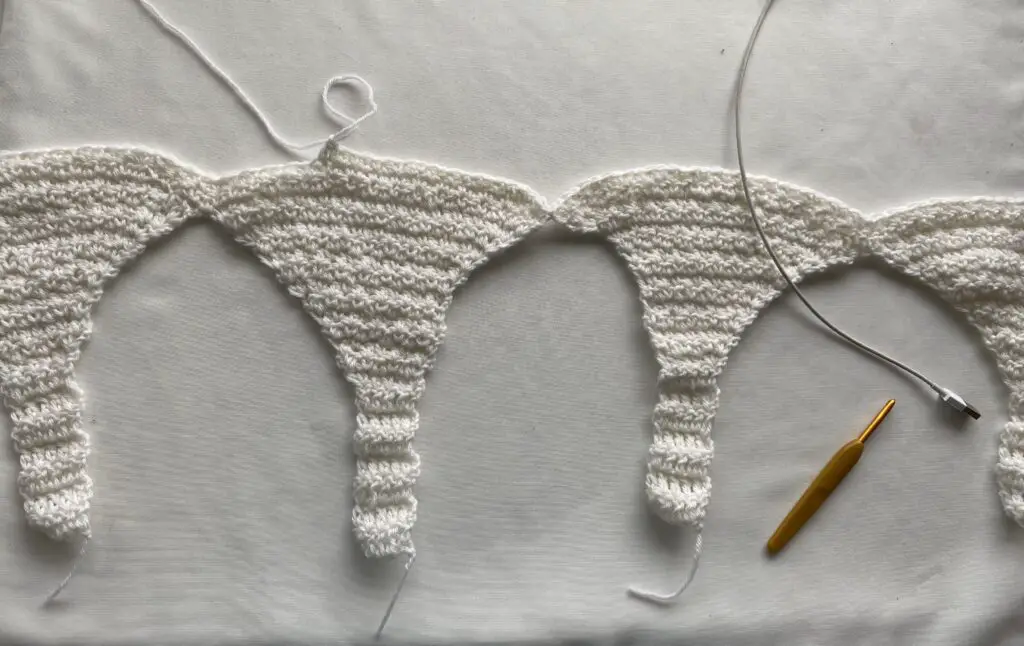
Starting with the left side:
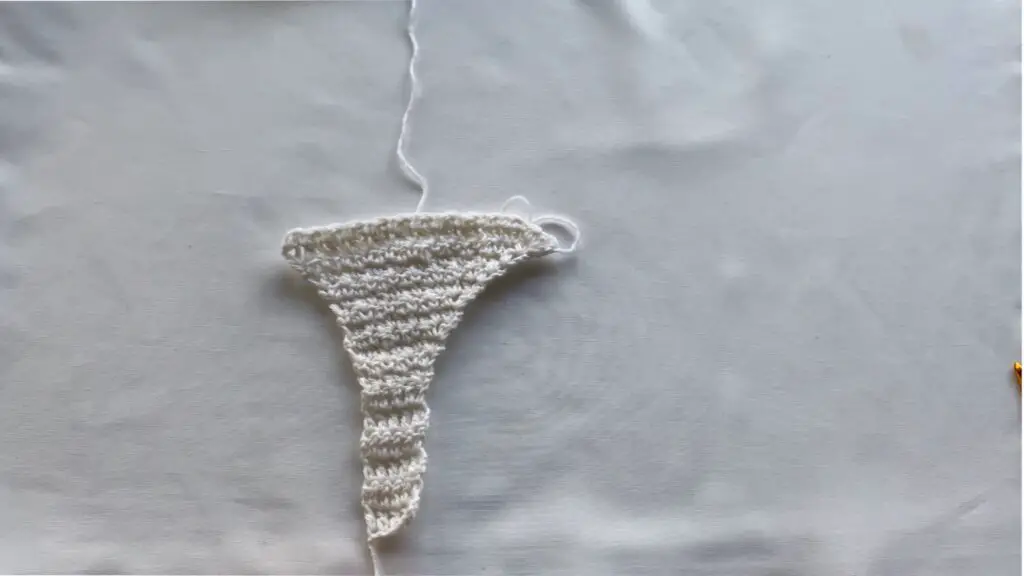
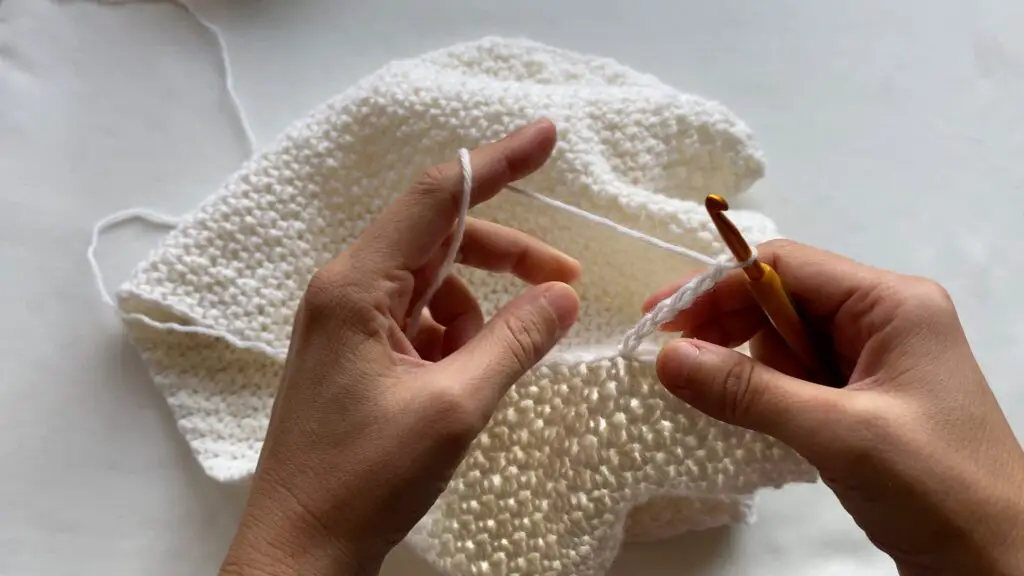
Row 1: Ch 7, 1 dc to 3rd ch from hook, 1 dc to next 4 sts. Ch 2 and turn your work.
Row 2-6: 1 dc to each st. 5dc
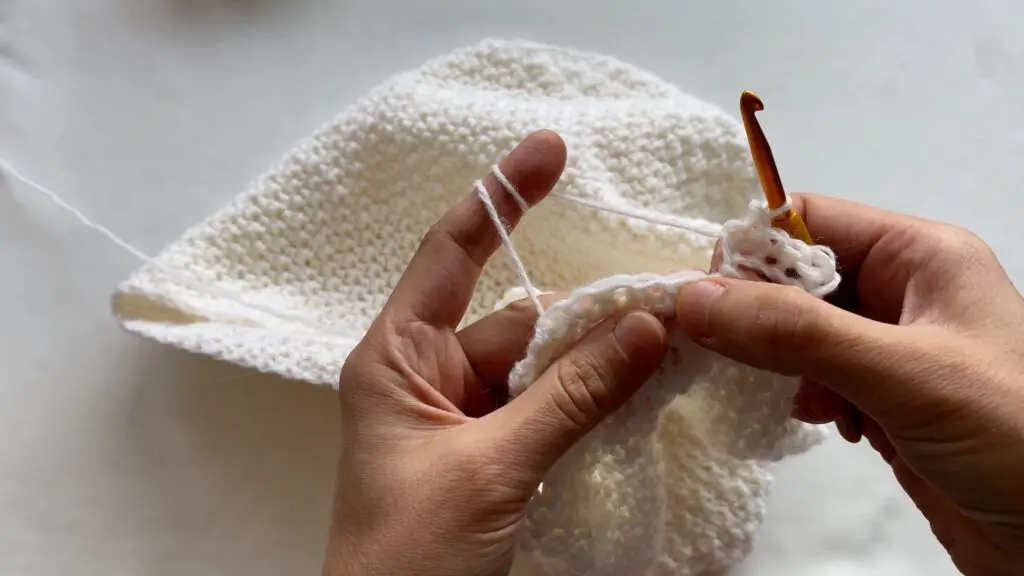
Row 7: Ch 1, 1sc and 1dc to next st, (1 sc to next st, 1 dc to next st ) x2. 6 sts
Row 8: (1 sc to next st, 1 dc to next st )x 2, 1 sc to next st, 1 dc and 1 sc to next st. Total: 7 sts
Row 9: Ch 1. 1 sc , 1 dc to next st, (1 sc to next st, 1 dc to next st )x 2, 1 sc to next st, 1 dc, 1 sc to next st. Total: 9 sts
Row 10: Ch 1. (1 sc to next st, 1 dc to next st) x4, 1 sc, 1 dc to next st. Total 10 sts
Row 11: Ch 1. 1 sc, 1 dc to next st, (1 sc to next st, 1 dc to next st) x4, 1 sc to last st. Total 11 sts
Row 12: Ch 1. (1 sc to next st, 1 dc to next st) x5, 1 sc, 1 dc to last st, Total 12 sts
Row 13: Ch 1. 1 sc, 1 dc to next 2 sts, (1 sc to next st, 1 dc to next st) x5, Total 14 sts
Row 14: Ch 1. 1 sc, 1 dc to next st, (1 sc to next st, 1 dc to next st) x5, 1 sc to next st, 1 dc, 1 sc to last 2 sts. Total 17 sts
Row 15: Ch 1. 1 sc, 1 dc to next st, (1 sc to next st, 1 dc to next st) x7, 1 sc to next st, 1 dc, 1 sc to last st. 19 sts
Row 16: Ch 1. 1 sc, 1 dc to next st, (1 sc to next st, 1 dc to next st) x8, 1 sc to next st, 1 dc, 1 sc to last st. 21 sts
Row 17: Ch 1. 1 sc, 1 dc to next 2 sts, (1 sc to next st, 1 dc to next st) x9, 1 sc, 1 dc to last st. 24 sts
Row 18: Ch 1. 1 sc, 1 dc to next st, (1 sc to next st, 1 dc to next st) x11, 1 sc, 1 dc to last st. 26 sts. Ch 1. Fasten off.
Working on the right side:
Row 1: Ch 7, 1 dc to 3rd ch from hook, 1 dc to next 4 sts. Ch 2 and turn your work.
Row 2-6: 1 dc to each st. 5dc
Row 7: Ch 1, (1 sc to next st, 1 dc to next st) x2. 1sc and 1dc to last st. 6 sts.Row 8: 1 sc and 1 dc to next st. (1 sc to next st, 1 dc to next st )x 2, 1 sc to last st. Total: 7 sts.
Row 9: Ch 1. 1 sc , 1 dc to next st, (1 sc to next st, 1 dc to next st )x 2, 1 sc to next st, 1 dc, 1 sc to next st. Total: 9 sts.
Row 10: Ch 1. 1 sc, 1 dc to next st. (1 sc to next st, 1 dc to next st) x4. Total 10 sts.
Row 11: Ch 1. (1 sc to next st, 1 dc to next st) x4, 1 sc to next st. 1 dc, 1 sc to next st, Total 11 sts.
Row 12: Ch 1. 1 sc, 1 dc to next st. (1 sc to next st, 1 dc to next st) x5, Total 12 sts.
Row 13: Ch 1. (1 sc to next st, 1 dc to next st) x5, 1 sc, 1 dc to last 2 sts. Total 14 sts.
Row 14: Ch 1. 1 sc, 1 dc to next 2 sts, (1 sc to next st, 1 dc to next st) x5 .1 sc to next st. 1 dc, 1 sc to last st. Total 17 sts.
Row 15: Ch 1. 1 sc, 1 dc to next st, (1 sc to next st, 1 dc to next st) x7, 1 sc to next st, 1 dc, 1 sc to last st. 19 sts.
Row 16: Ch 1. 1 sc, 1 dc to next st, (1 sc to next st, 1 dc to next st) x8, 1 sc to next st, 1 dc, 1 sc to last st. 21 sts.
Row 17: Ch 1. 1 sc, 1 dc to next st, (1 sc to next st, 1 dc to next st) x9, 1 sc, 1 dc to last 2 sts. 24 sts.
Row 18: Ch 1. 1 sc, 1 dc to next st, (1 sc to next st, 1 dc to next st) x11, 1 sc, 1 dc to last st. 26 sts.
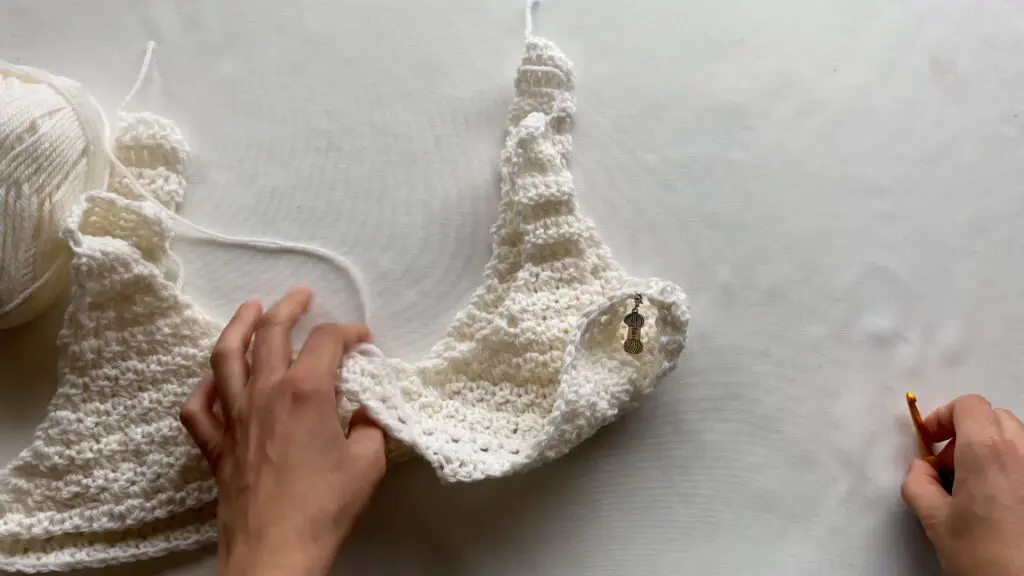
Connecting right side with left: side
Row 19 (connecting row): Ch 1. 1 sc, 1 dc to next 2 sts, (1 sc to next st, 1 dc to next st) x11, 1 sc to next st. 1 dc, 1 sc to last st.
Connect one side to other: 1 dc, 1 sc to next st. Alternate 1 dc next st, 1 sc to next st until the last 2 sts.
1 sc, 1dc to last 2 sts. Ch1 and turn your work. In this row, total sts are 58, counting 2 sides together.
Row 20: Ch 1. 1 sc, 1 dc to next 2 sts, (1 sc to next st, 1 dc to next st ) x 27 1 sc ,1 dc to last 2 sts. Total: 62 sts in this row.
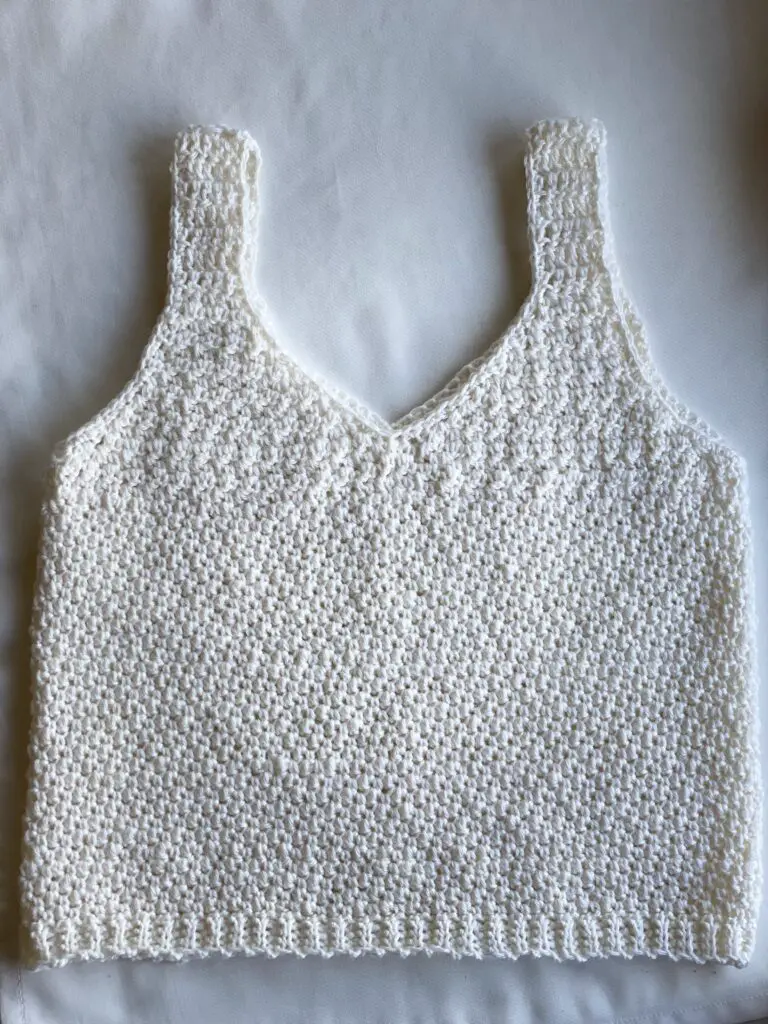
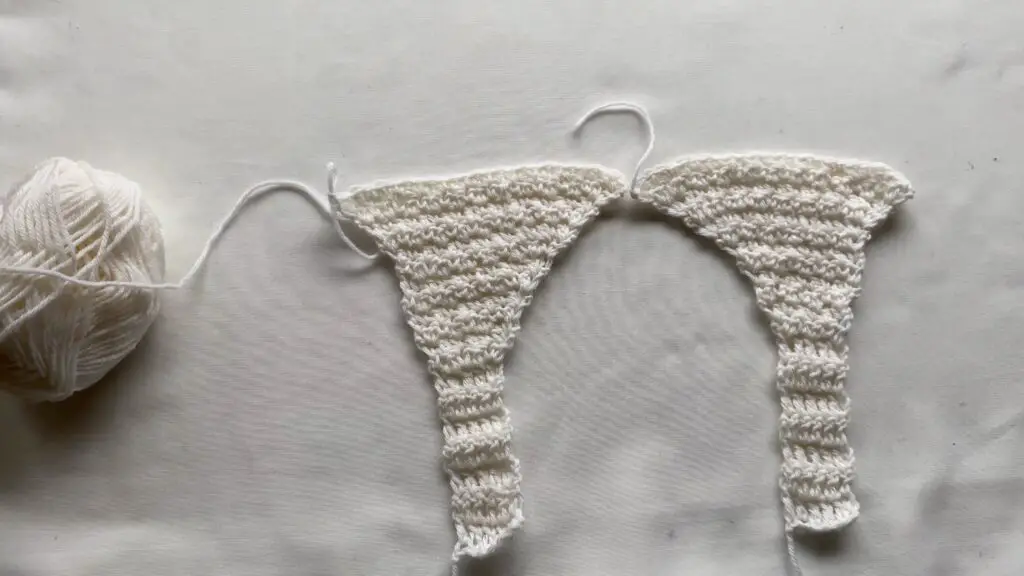
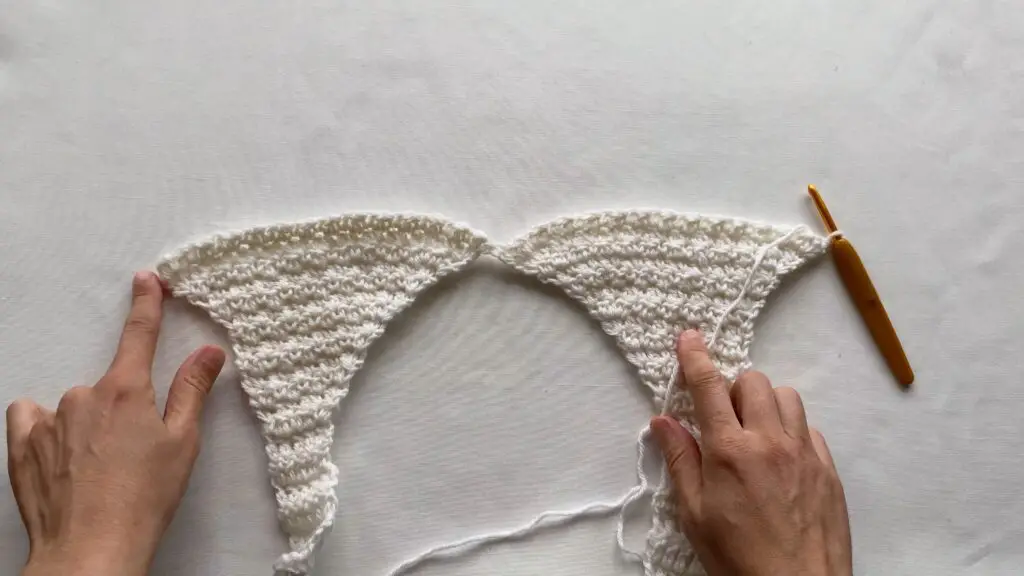
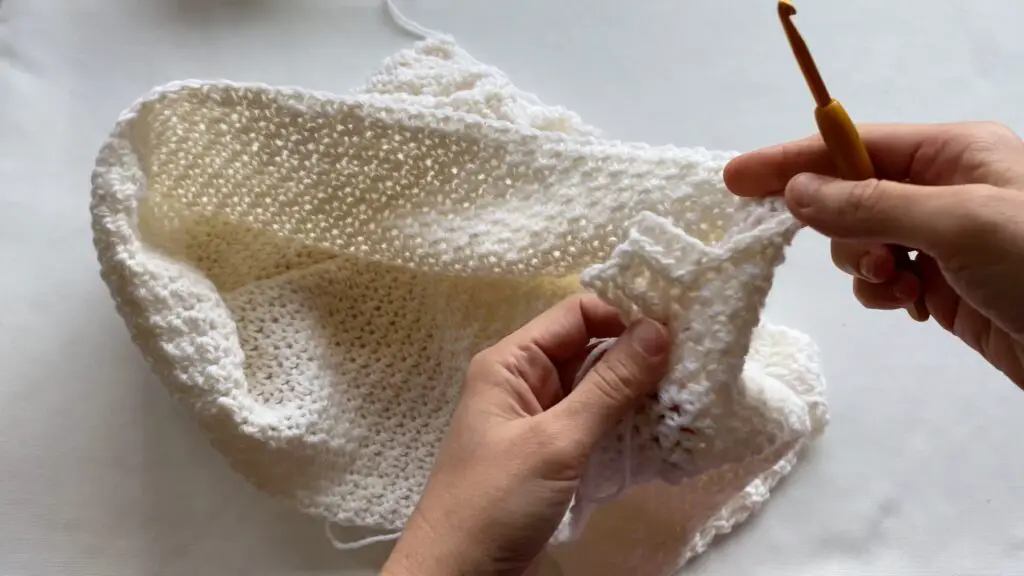
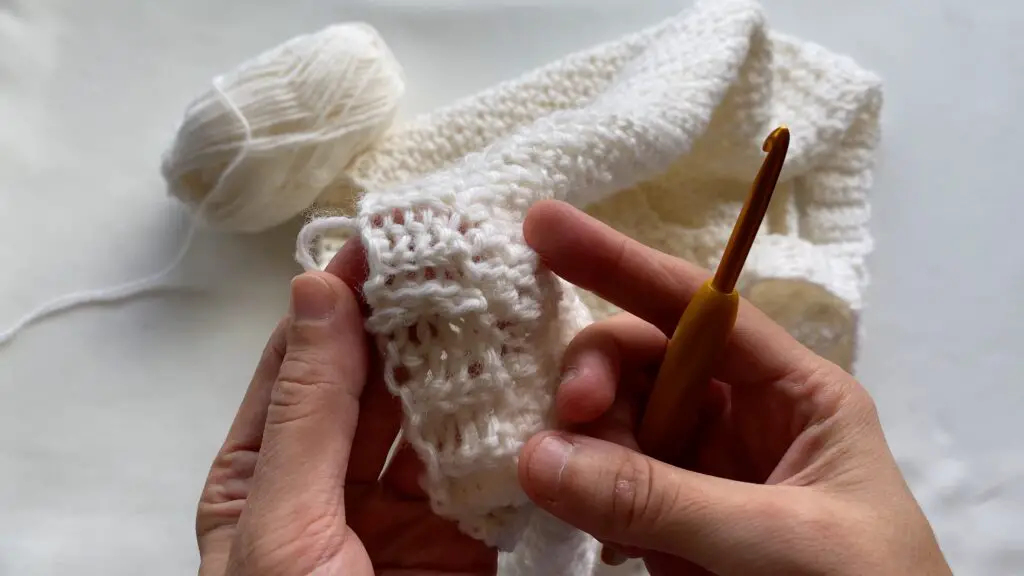
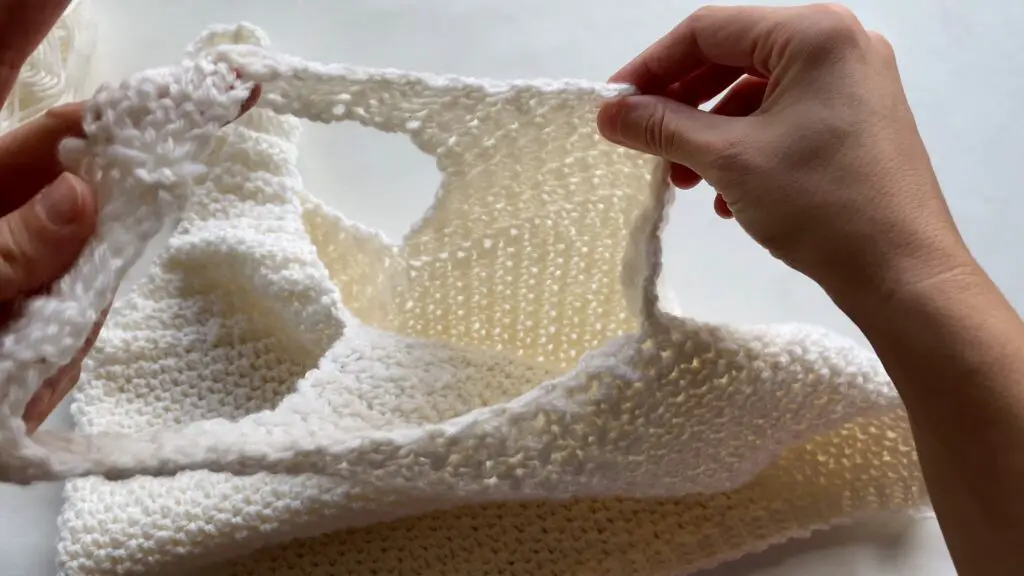
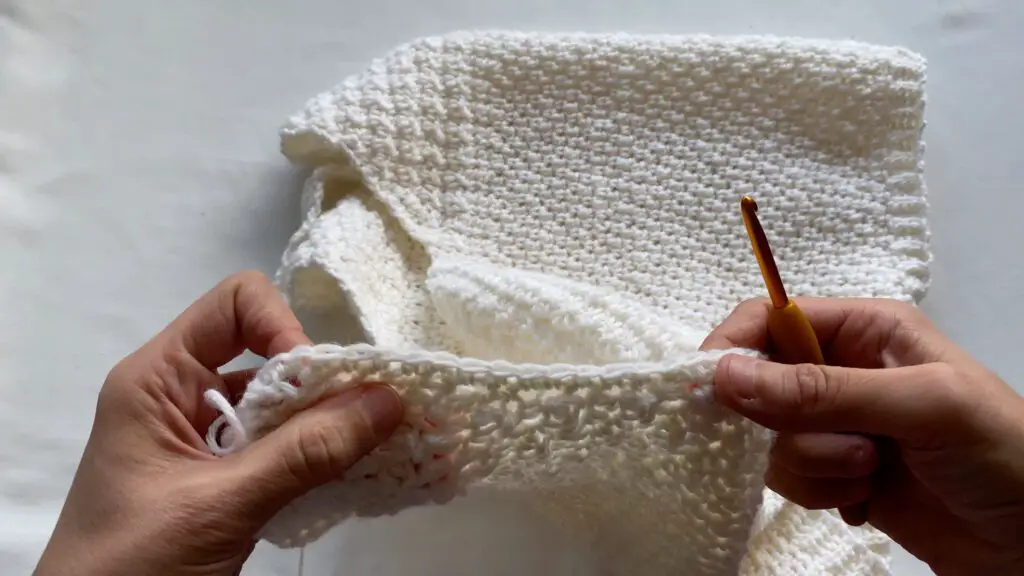
Make another identical piece (right and left- make them separately and connect them in row 19 and make one more row after connecting two sides, total of 20 rows). Now we are going to connect both front and back piece which includes right and left sides. See pic below.
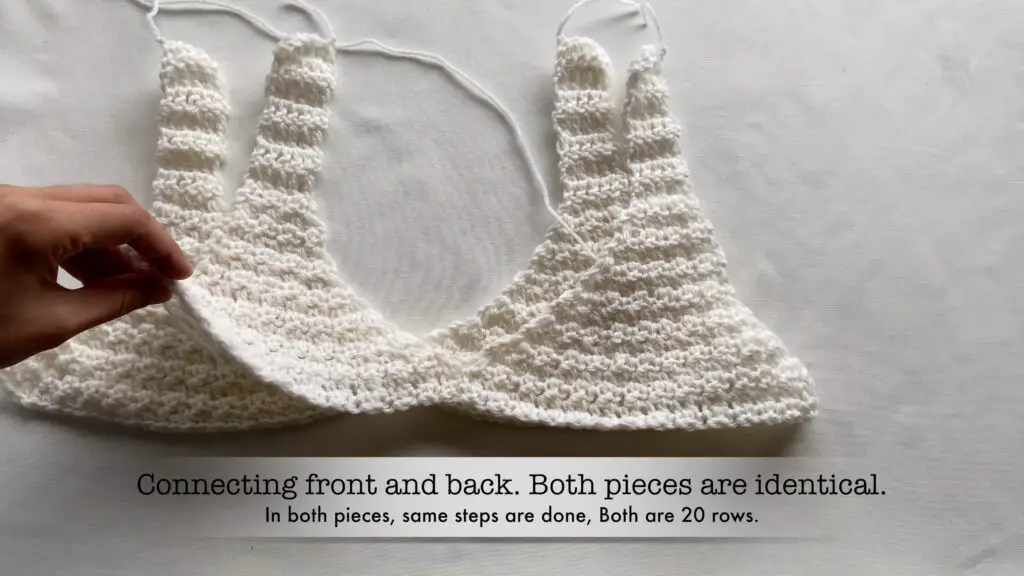
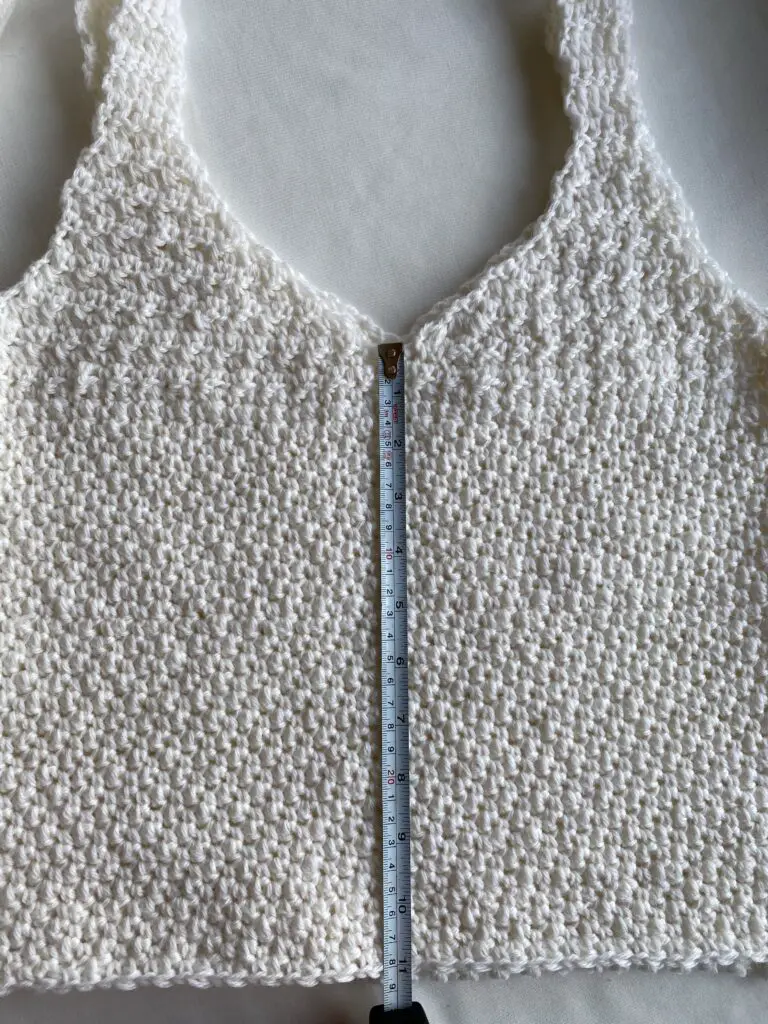
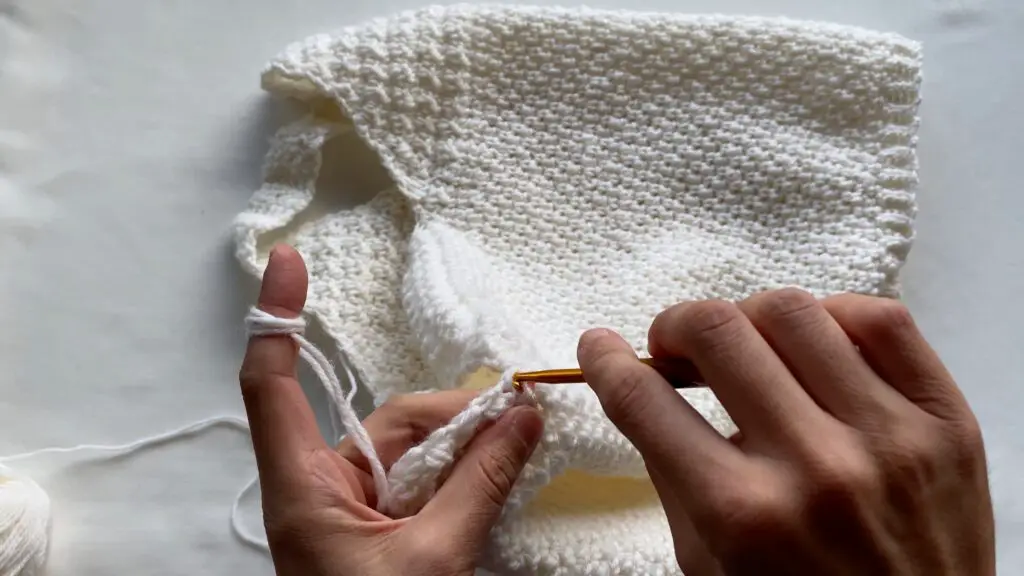
Body part: Connect back piece to the front piece. Going in a circular motion continue alternating 1 sc followed by 1 dc for each st. No decreasing or increasing.
Continue with ribbing:
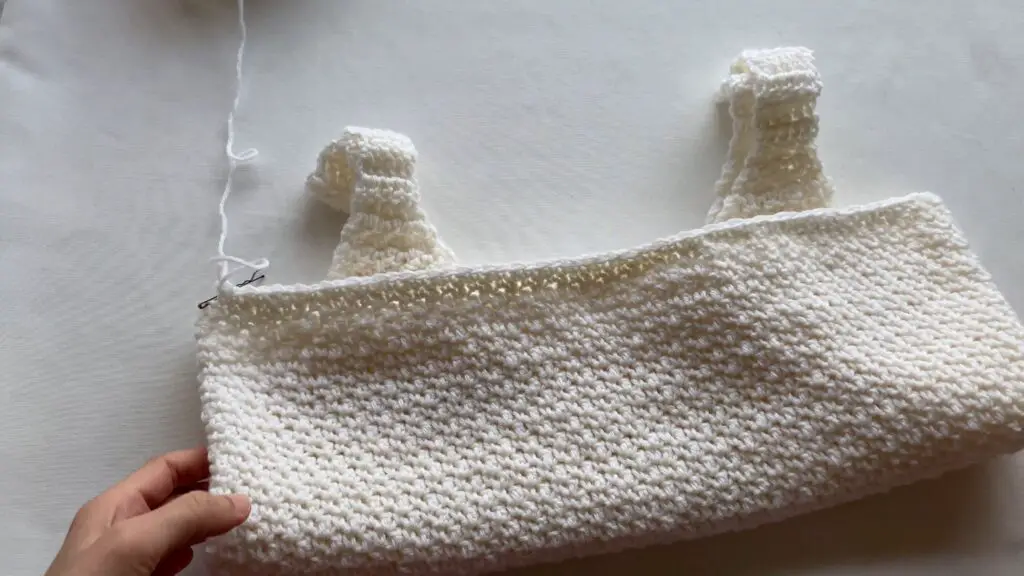

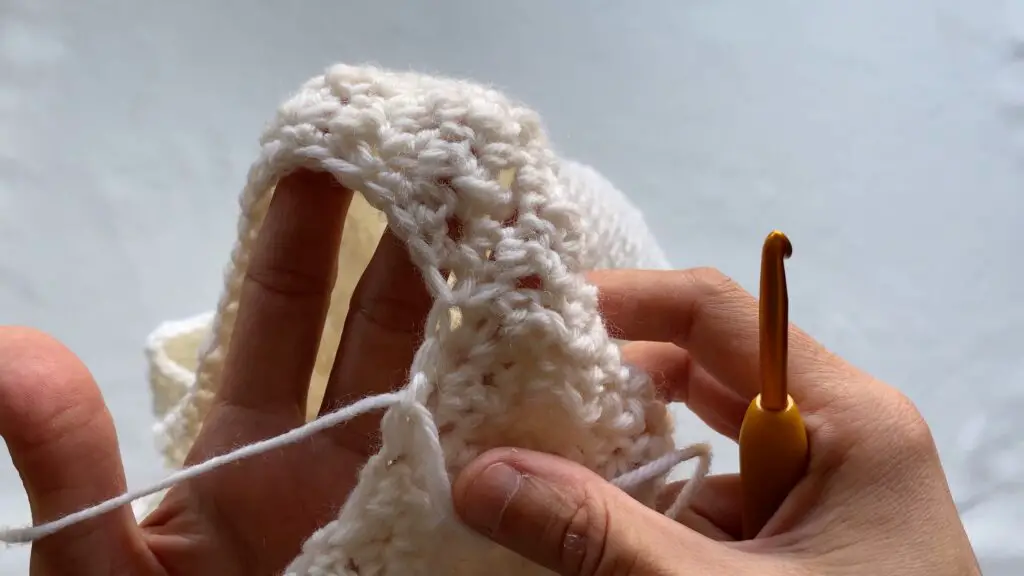
Ribbing: Sl st to the st where the st marker was and ch 6, starting from 3rd ch from hook, 1 double sl st to each st. 4 sl sts.

Turn your work, 1 double sl st to blo until the last st, 1 double sl st to last st.. 4 sl sts.
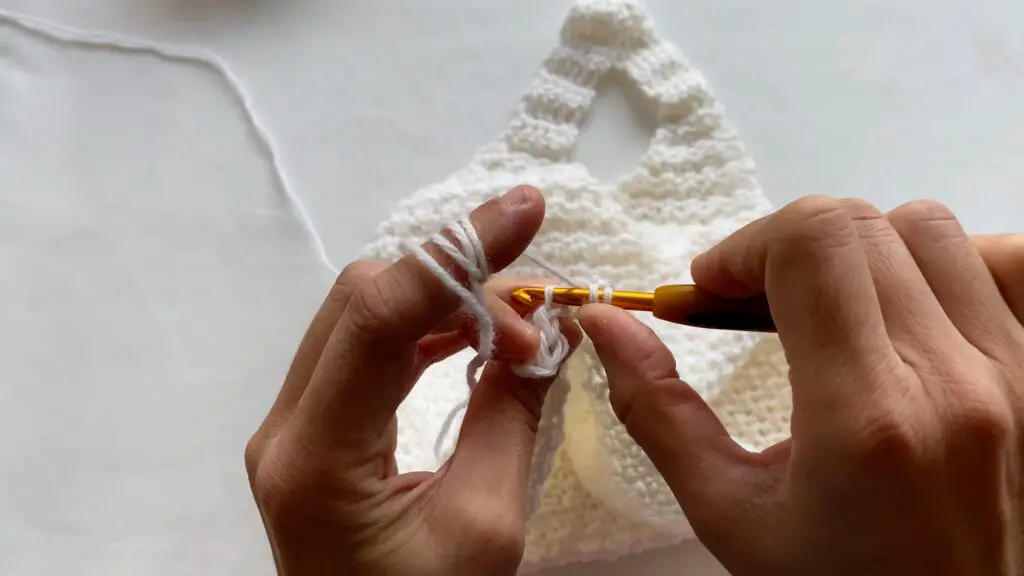
Ch 2 and turn your work. Continue this ribbing all the way around the edge.
Working on the armhole ribbing:
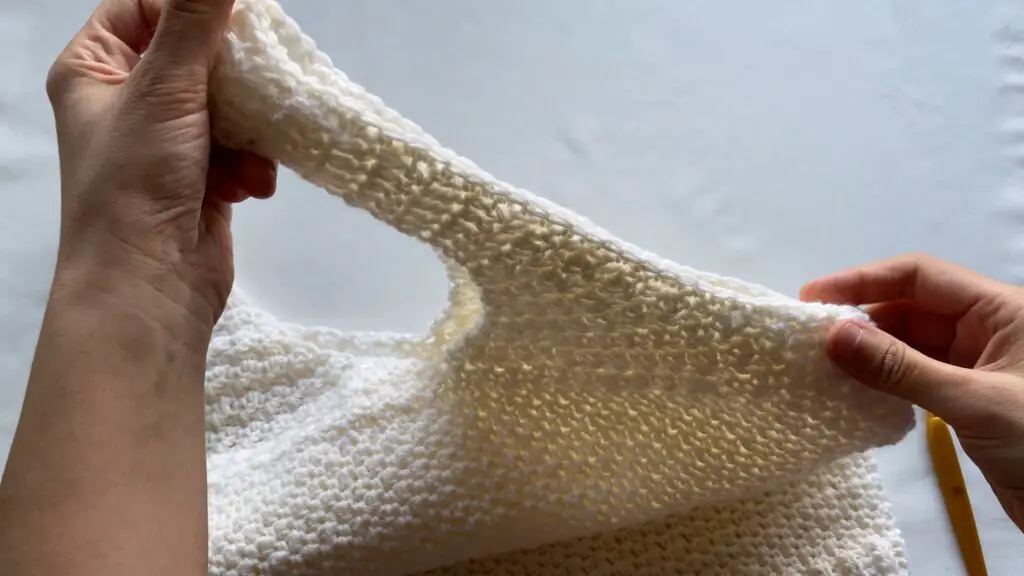
Make same ribbing for the front and back of the neck.
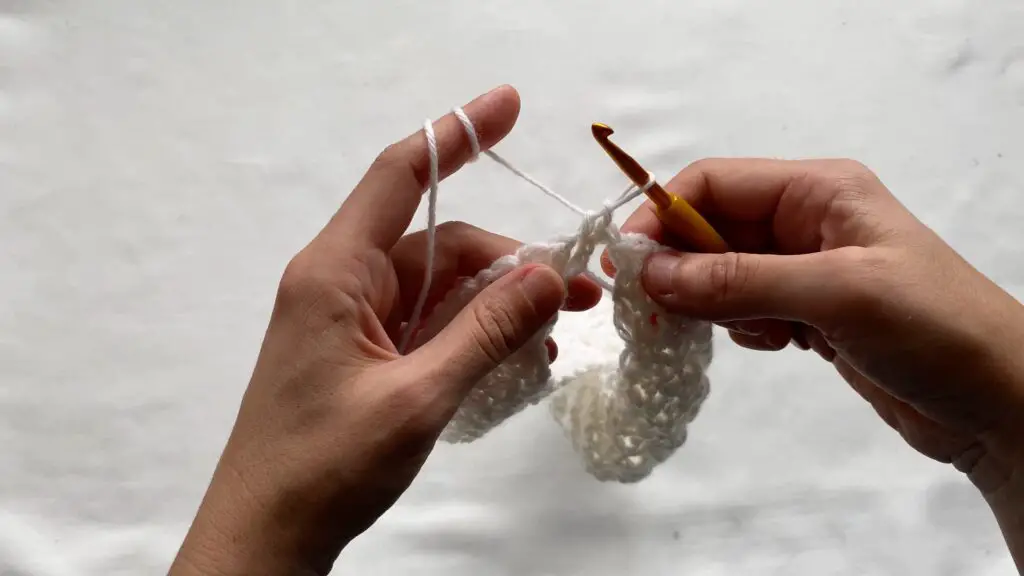
When you connect the “v” shape part in the middle, sc3tog to form the pointy part. See pic below.

Fasten off at the end. And weave the ends. Done with the top. I recommend you to make this top. You’ll love it!
Thank you!
Leave a Reply