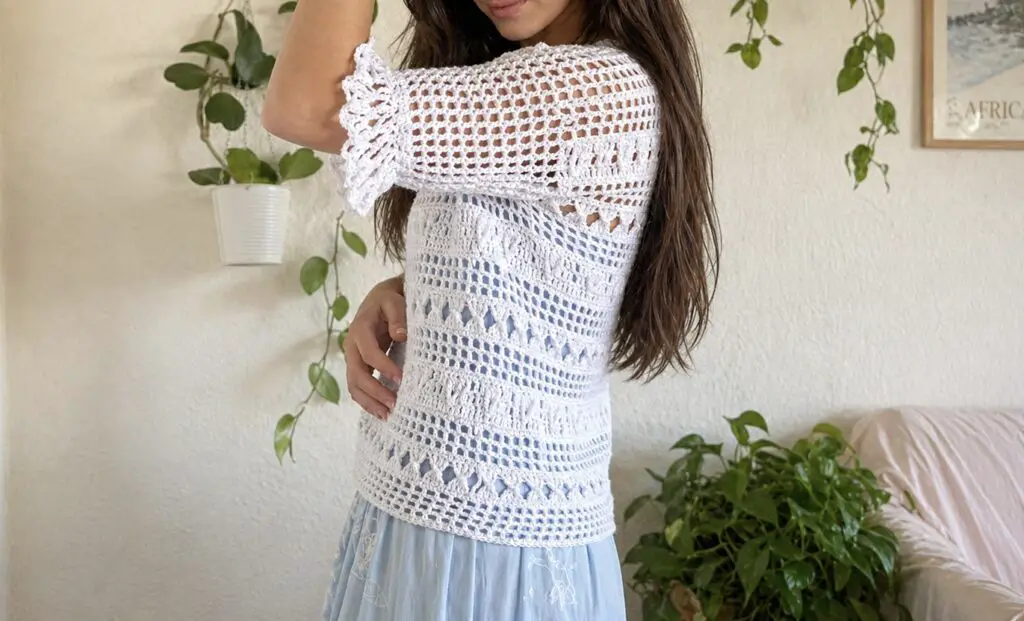
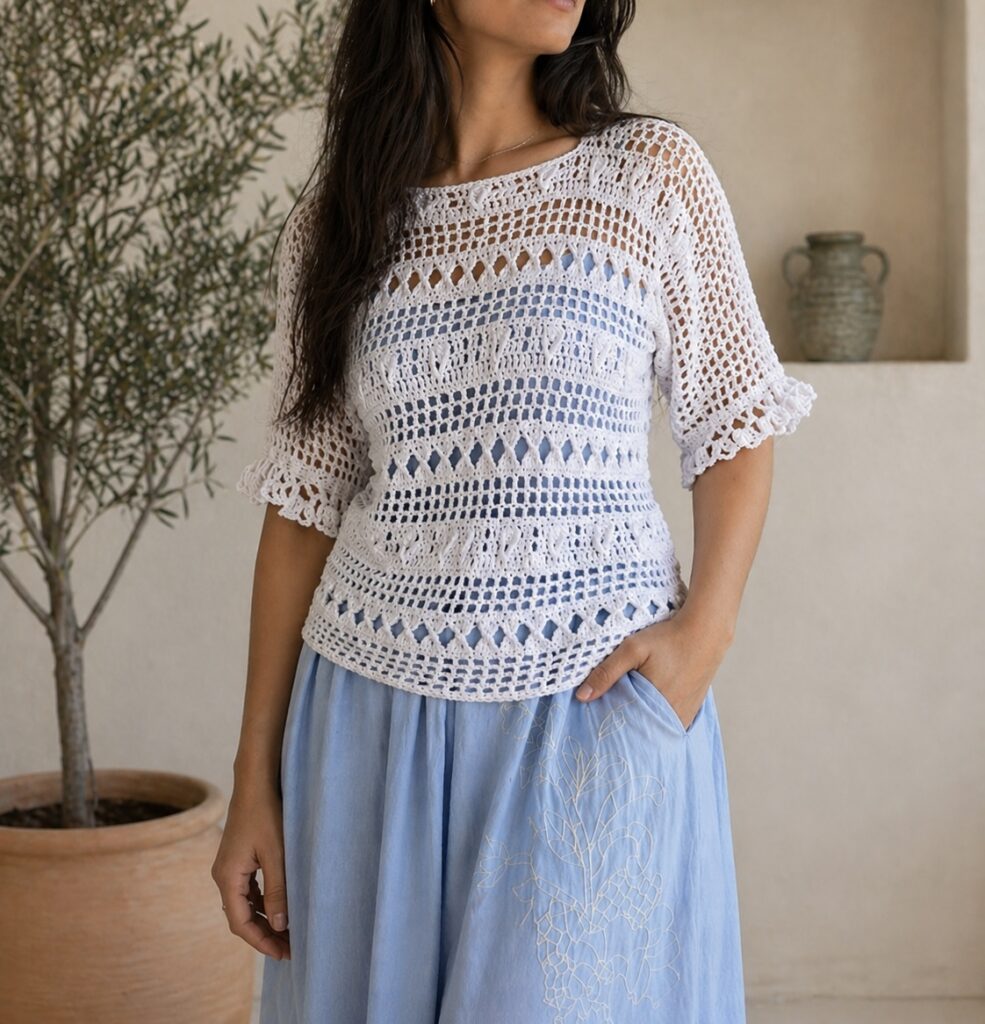
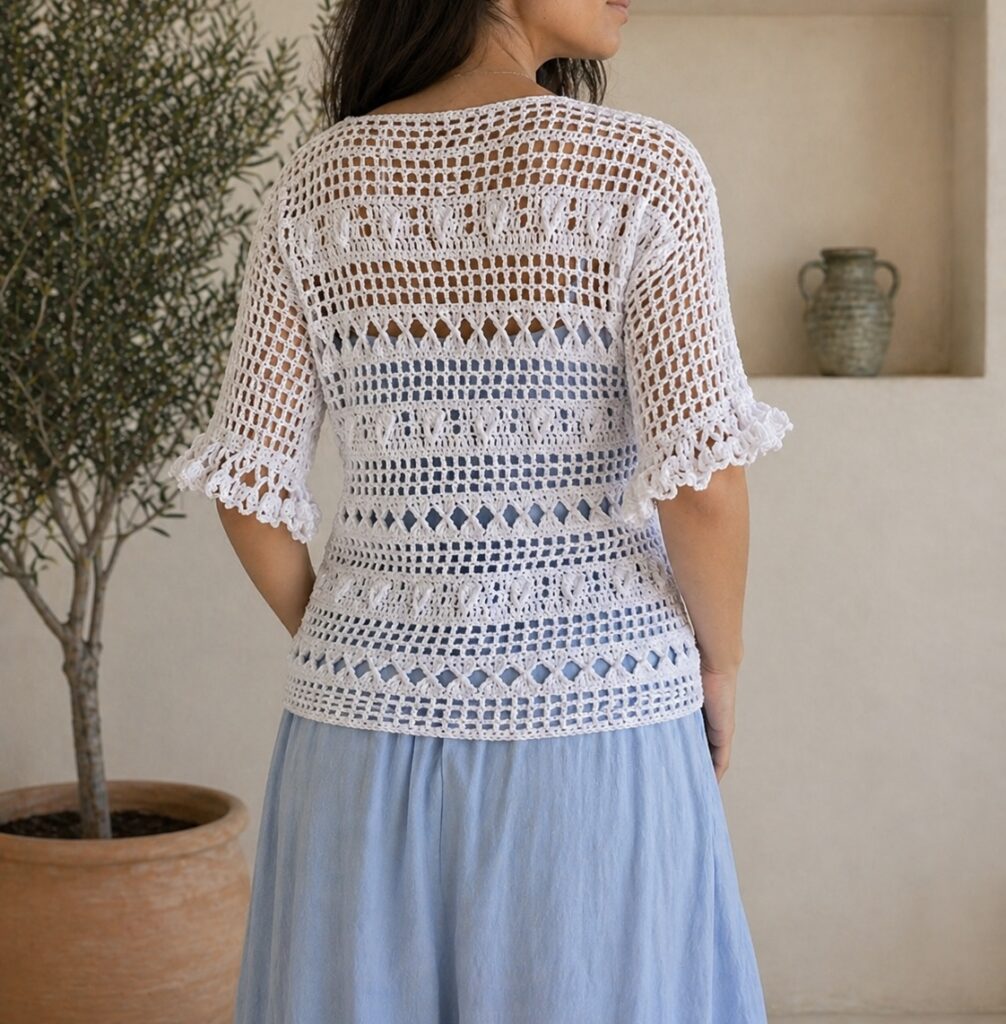
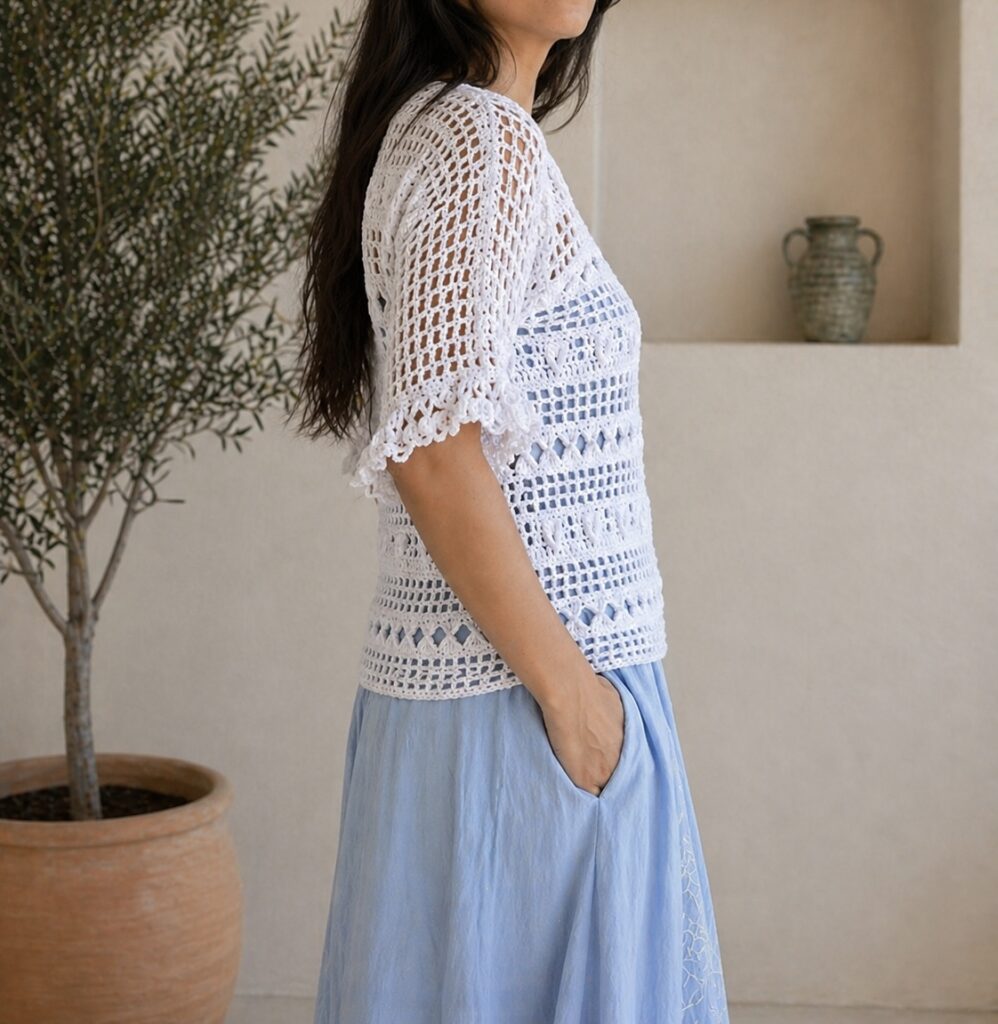
Crochet Lace Top Pattern
This crochet lace top features beautiful textured stitch patterns, elegant lace panels, and feminine sleeves. The top is worked from the bottom up, beginning with a foundation single crochet band. The body is worked in the round to the armholes, then the front and back are worked separately. Delicate neckline shaping and decorative sleeves complete the design.
This pattern is written for sizes XS (S, M, L, XL, 2XL, 3XL, 4XL, 5XL).
Sizing Note: This pattern was designed and tested in size Small. Additional sizes have been graded from the original sample. If you make another size, please let me know how it fits and share your feedback.


Finished Measurements
Bust: 31 (35, 39, 43, 47, 51, 55, 59, 63)”
Body Length to Armhole: 14” (36 cm) or desired length
Armhole Depth: 6.5 (7, 7.5, 8, 8.5, 9, 9.5, 10, 10.5)”
Materials
- Weight 3 (DK) yarn
- 3.5 mm crochet hook
- Tapestry needle
- Stitch markers
- Scissors
Gauge
18 double crochet = 4” (10 cm)
10 rows = 4” (10 cm)
Abbreviations
ch = chain
sc = single crochet
dc = double crochet
edc = extended double crochet
tr = treble crochet
fpdtr = front post double treble crochet
dtr4tog = double treble crochet 4 together
puff = puff stitch
sl st = slip stitch
st(s) = stitch(es)
rep = repeat
Pattern Notes
- Pattern is worked from the bottom up.
- Foundation rows must remain a multiple of 8.
- Body is worked in the round until the armholes.
- Front and back are worked separately.
- Read through the entire pattern before beginning.
- Use stitch markers to identify side seams and neckline placement.
- Ch-2 at the beginning of a round does not count as a stitch unless otherwise stated.
Foundation Band
Foundation Rows
XS (S, M, L, XL, 2XL, 3XL, 4XL, 5XL)
152 (168, 184, 200, 216, 232, 248, 264, 280) rows
Make a slip knot and ch 2.
Row 1: Ch 1, work 1 sc into the back bump of the second ch from hook.
Row 2: Ch 1, turn, work 1 sc into the ch st from previous row.
Rows 3–152 (168, 184, 200, 216, 232, 248, 264, 280): Repeat Row 2.
Do not fasten off.
Carefully ensure the foundation strip is not twisted. Join with a sl st to the first st to form a ring.
Mesh Section
Round 1: Ch 3, skip next st, dc in next st. Ch 1, skip next st, dc in next st. Rep from around. Join with sl st to second ch of beginning ch.
Rounds 2–4: Ch 4, skip next ch-1 sp, dc in next dc. Ch 1, skip next ch-1 sp, dc in next dc. Rep from around. Join with sl st.
Round 5: Ch 1. Work 1 sc into each dc and 1 sc into each ch-1 space around. Join with sl st.
Decorative Body Pattern
Round 6
Ch 7.
Work a dtr4tog over the next 4 sts.
Work 2 edc into the 3rd back bump of the beginning ch-7.
Work 1 tr around the first leg of the dtr4tog.
Work a dtr4tog over the next 4 sts, 2 edc into the 3rd back bump of the beginning ch-7, and 1 tr around the first leg of the dtr4tog.
Repeat from * around.
Join with a sl st and ch 1.
Round 7
Work 1 sc in each st around.
Join with a sl st and ch 4.
Round 8
Skip next st, dc in next st.
Ch 1, skip next st, dc in next st.
Repeat from * around.
Join with a sl st.
Rounds 9–10: Repeat Round 8.
Round 11
Ch 1. Work 1 sc in each dc and 1 sc in each ch-1 space around.
Join with a sl st.
Round 12
Ch 2. Work 1 dc in each st around. Join with a sl st.
Round 13
Ch 2. Dc in next 7 sts.
Ch 1, skip next st, dc in next 7 sts.
Repeat from * around.
Join with a sl st.
Round 14
Ch 2. Dc in next 2 sts.
Work 1 fpdtr around the second dc from Round 13.
Skip one st behind the post stitch.
Work 1 puff st in next st.
Work another fpdtr around the same dc used for the first post stitch.
Skip one st behind the post stitch.
Dc in next 2 sts.
Ch 1. Skip ch-1 space.
Dc in next 2 sts.
Repeat this decorative sequence around.
Join with a sl st.
Round 15
Ch 1. Work 1 sc in every st and every ch-1 space around.
Join with a sl st.
Round 16
Ch 4. Skip next st. Dc in next st.
Ch 1, skip next st, dc in next st.
Repeat from * around. Join with a sl st.
Rounds 17–18: Repeat Round 16.
Repeat Rounds 5–18 one additional time.
Continue until body measures approximately 14” (36 cm) from foundation edge.
Front and Back Panels
Separate for Front and Back
Place stitch markers at both side seams.
Work the front panel first.
Front Increase Row
To maintain the stitch pattern multiple, increase 4 sts evenly across the row.
Front stitch counts:
XS (S, M, L, XL, 2XL, 3XL, 4XL, 5XL)
80 (88, 96, 104, 112, 120, 128, 136, 144) sts
Setup Row
Ch 1, turn. Work 1 sc in each st across.
Pattern Row
Ch 7, turn.
Work established decorative pattern across the row.
Continue working the established stitch pattern until front panel measures approximately 5” (13 cm) above armhole separation.
Neckline Shaping
Mark center neckline section.
Leave:
4 (4, 5, 5, 6, 6, 7, 7, 8) pattern repeats unworked for neckline.
Left Neckline
Continue in pattern until 7 sts remain before neckline marker.
Dc in final 7 sts. Ch 2 and turn.
Neckline Row 2
Dc in first 7 sts. Continue mesh pattern across.
Neckline Row 3
Work mesh pattern.
When 7 sts remain, work decorative motif across final section.
Neckline Row 4
Work 1 sc in each st and each space.
Neckline Row 5
Work mesh pattern.
Dc in final 7 sts.
Repeat Rows 2–5 until shoulder measures approximately 9” (23 cm).
Fasten off.
Right Neckline
Join yarn and mirror all neckline shaping instructions.
Back Panel
Work the back exactly as the front but without neckline shaping.
Continue straight in established pattern until back matches front shoulder height.
Do not work the final single crochet joining row.
Shoulder Join
With right sides facing outward, join shoulders using single crochet.
Work through corresponding shoulder stitches.
Across the back neckline section, continue working single crochet evenly across the back edge.
Fasten off.
Sleeves and Finishing
Sleeves
Join yarn in underarm space.
Round 1
Ch 2. Dc in next st. Ch 1. Dc in next space. Ch 1. Dc in center of treble stitch. Ch 1. Dc in same space.
Continue establishing mesh pattern evenly around sleeve opening.
Join with sl st.
Round 2
Ch 4. Skip next space. Dc in next st.
Ch 1, skip next space, dc in next st.
Repeat from * around.
Join with sl st.
Rounds 3–12
Repeat Round 2.
Round 13
Ch 2. Work 2 dc in first st.
*Dc in next space, dc in next st. Repeat from * around.
Join with sl st.
Round 14
Ch 5. Tr in same st.
* Skip 2 sts, tr in next st, ch 5, tr in same st. Repeat from * around.
Join with sl st.
Move with sl sts to next ch-5 space.
Round 15
Ch 3. Work 2 tr, ch 5, 2 tr in same space.
*Work 2 tr, ch 5, 2 tr in next ch-5 space. Repeat from * around.
Join with sl st.
Fasten off.
Repeat for second sleeve.
Tie Cord
Ch 100.
Fasten off.
Weave cord through neckline openings as desired.
Finishing
Weave in all ends.
Wet block to finished measurements.
Allow garment to dry completely before wearing.
Customize Your Fit
- Add or subtract foundation rows in multiples of 8 for custom bust sizing.
- Add body repeats before armholes for additional length.
- Add sleeve rounds for longer sleeves.
- For an oversized fit, choose the next size up.
- For a fitted look, choose the size corresponding to your actual bust measurement.
Your Crochet Lace Top is now complete!
Leave a Reply