Hello everyone,
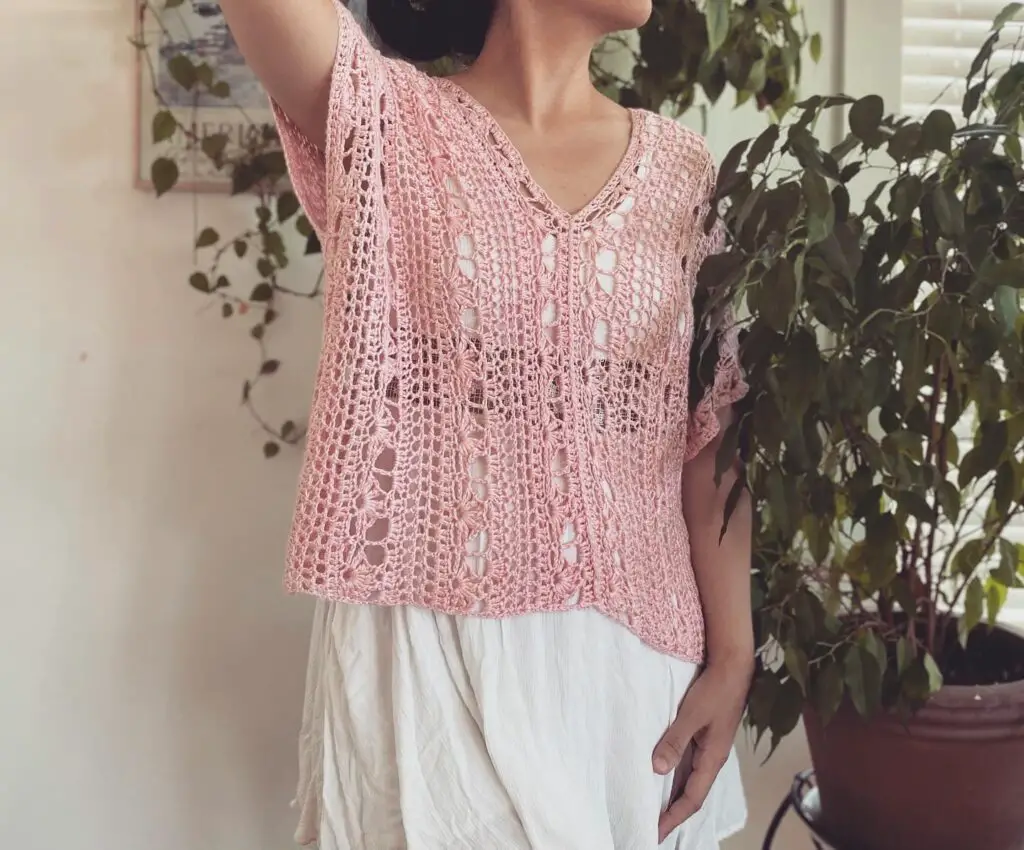
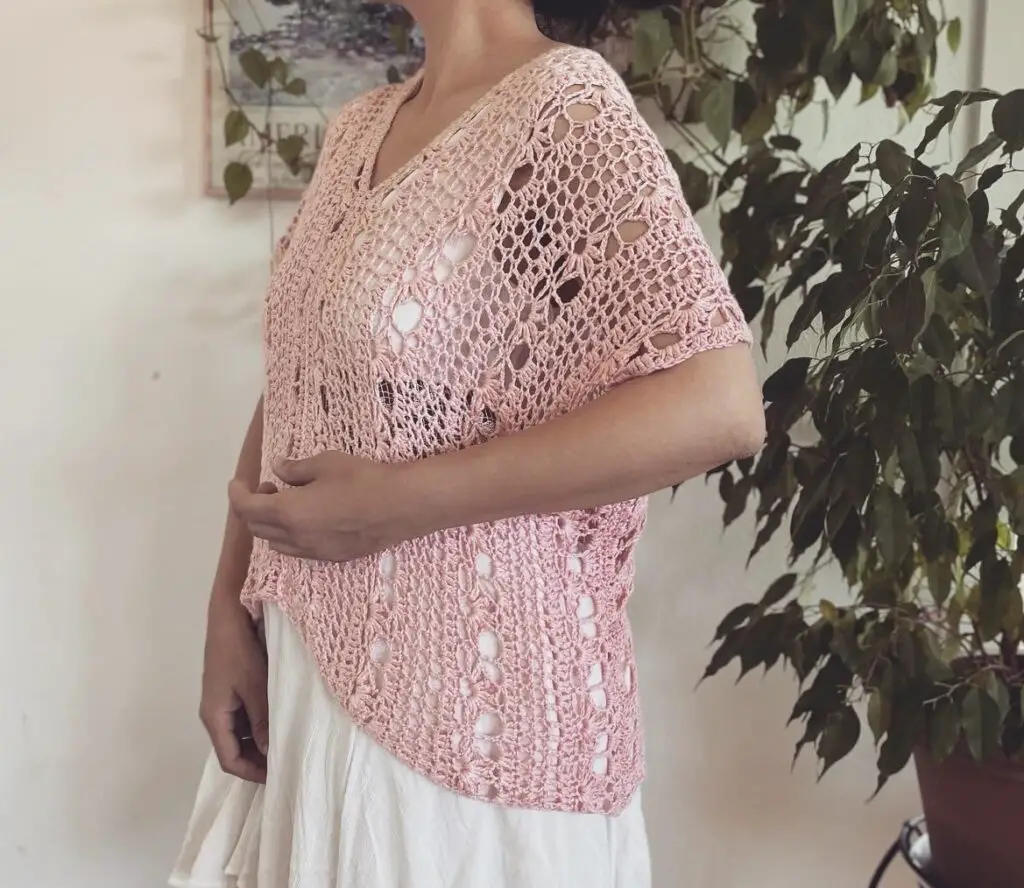
This beautiful crochet lace summer top is made with only 2 rectangle panels. It’s very light and comfortable to wear over a tank top or swim suit. It’s also very easy to make.
I used DK weight yarn, 100% Rayon from Bamboo. And I think this yarn is perfect for making light summer tops like this. It feels breezy light (pun intended), with a silky feeling.
*I am not sponsored by this yarn brand, but I did put the Amazon affiliate link under listed materials, and this gives me a small commission if you buy the yarn by clicking the link.
This top is meant to fit large so it can fit to S/M/L sizes. You can make this blouse as big as or as long as you like.
Abbreviations:
Ch: Chain
Sc: Single crochet
Dc: Double crochet
Sk: Skip
St (s): Stitch (es)
Sl st: Slip stitch
Rep.: Repeat
Dc2tog: Double crochet 2 together
Tr: Treble crochet
Materials:
Yarn: https://amzn.to/3Xm6MDW (3 skeins of yarn used for this top-this is S/M size)
Crochet hook: https://amzn.to/4bnLATK (3.5 mm crochet hook is used)
Yarn needle and scisors
Measurement:
1 rectangle panel: 11 inches (28 cm) x 38 inches (96 cm)
Written tutorial:
Row 1: Ch 172. 1 dc to the back bump of 3rd ch from the hook. Ch 1 and turn your work.


Row 2: 1 sc to first st. Ch 4, sk 3 sts, sl st to the 4th st. Ch 3, skip 1 st, sl st to the 2nd st.
*Ch 4, sk 3 sts, sl st to the 4th st. Ch 3, skip 1 st, sl st to the 2nd st. Rep. from * until the end of the row.

At the end of the row, Ch 1 and turn your work.
Row 3: 1 sc to the first st.


Ch 1, dc2 tog into the ch 2 space. (Ch 3 and dc2together into the same space) x 4 more times.

Ch 1, 1 sc into the sl st.

*Ch 1 (ch 3, dc2tog into the ch 3 space) x 5 times. Ch 1, 1 sc to the sl st. Rep. From * until the end of the row.

At the end of the row, ch 1 and turn your work.
Row 4: 1 sc to the first st. Ch 6, 1 sc to the second space, ch 3, 1 sc to the next space.
Ch 3, 1 tr to the sc stitch.


*Ch 3, 1 sc to the next 2nd and 3rd spaces, ch 3, 1 tr to the next sc st. Rep. from * until the end.

At the end, 1 tr to the very last sc st.


Ch 3 and turn your work.
Row 5: 4 dc into the next large space.

2 dc into the next space.

*4 dc into the next 2 large spaces, 2 dc into the next small space. Rep. from* until the end. 170 dc sts.

At the end of the row, ch 2 and turn your work.
1 dc to the first st. Ch 1, sk 1 st, 1 dc to the next st.
Row 6: *Ch 1, sk 1 st, 1 dc to the next st. Rep. from * until the end of the row. Ch 3 and turn your work. 1 dc into the next dc st.
Row 7-8: Ch 1, 1 dc into the each dc sts (st between the square mesh)

Row 9: 2 dc into the each ch 1 space. 170 dc.

Rep. rows 1 thru 9, 3 more times and rows 1 thru 5 one more time and fasten off. Make one more identical panel like this.
Put them side by side. Horizontal part is the short part, vertical is the longest part. Sew two pieces together leaving neckline opening. And do the same thing on the other side.

Sewing is done for 13 inches (33 cm) from bottom to the neckline. And the same measurement for the opposite site.

After sewing is done for the front and back piece, Sew the armholes. Armhole length 8 inches (21 cm)
Step by step video tutorial:
Leave a Reply