Hello everyone,
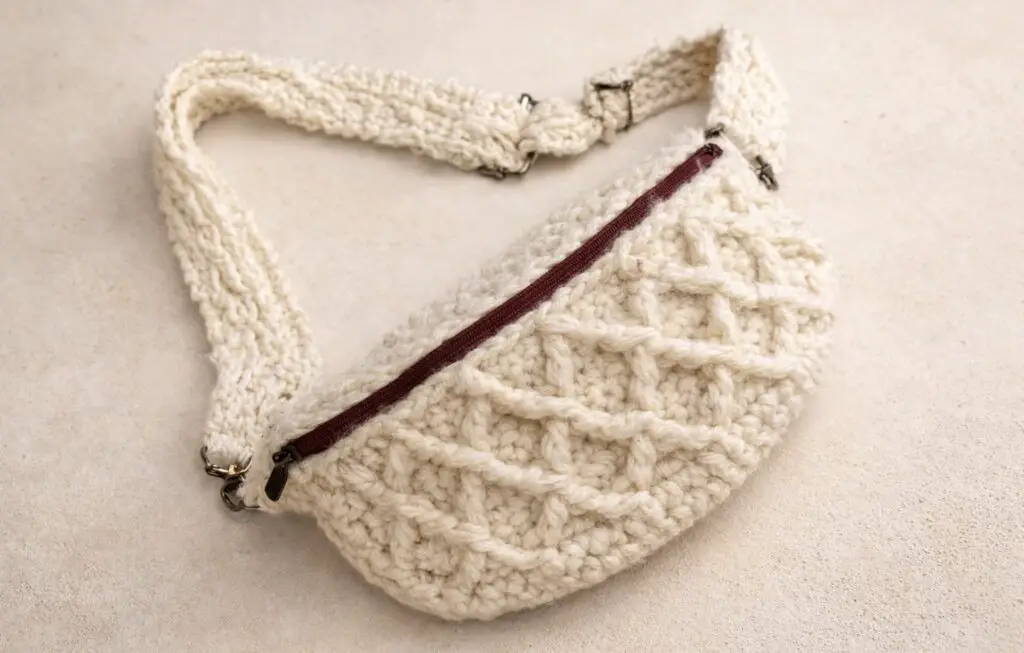
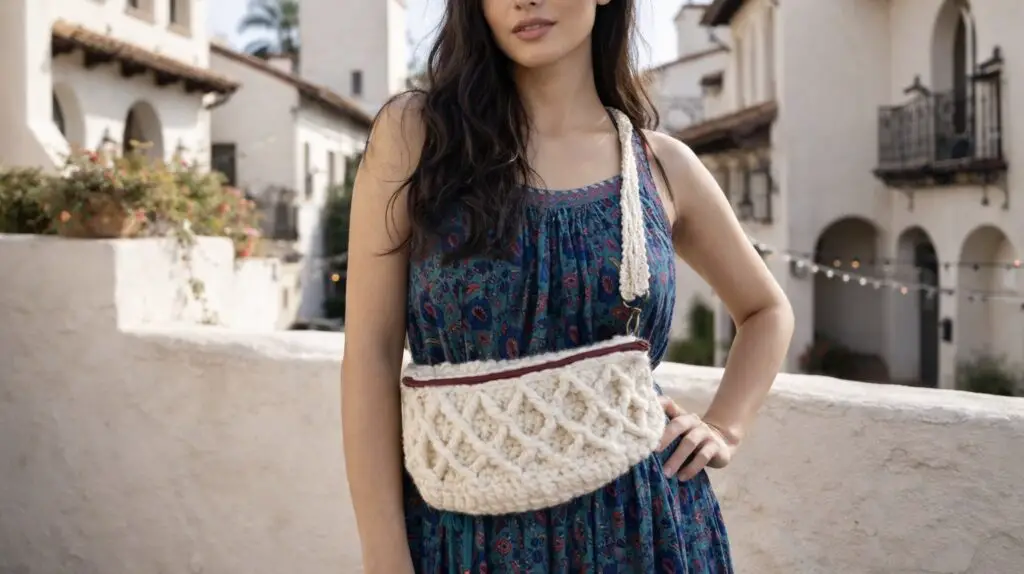
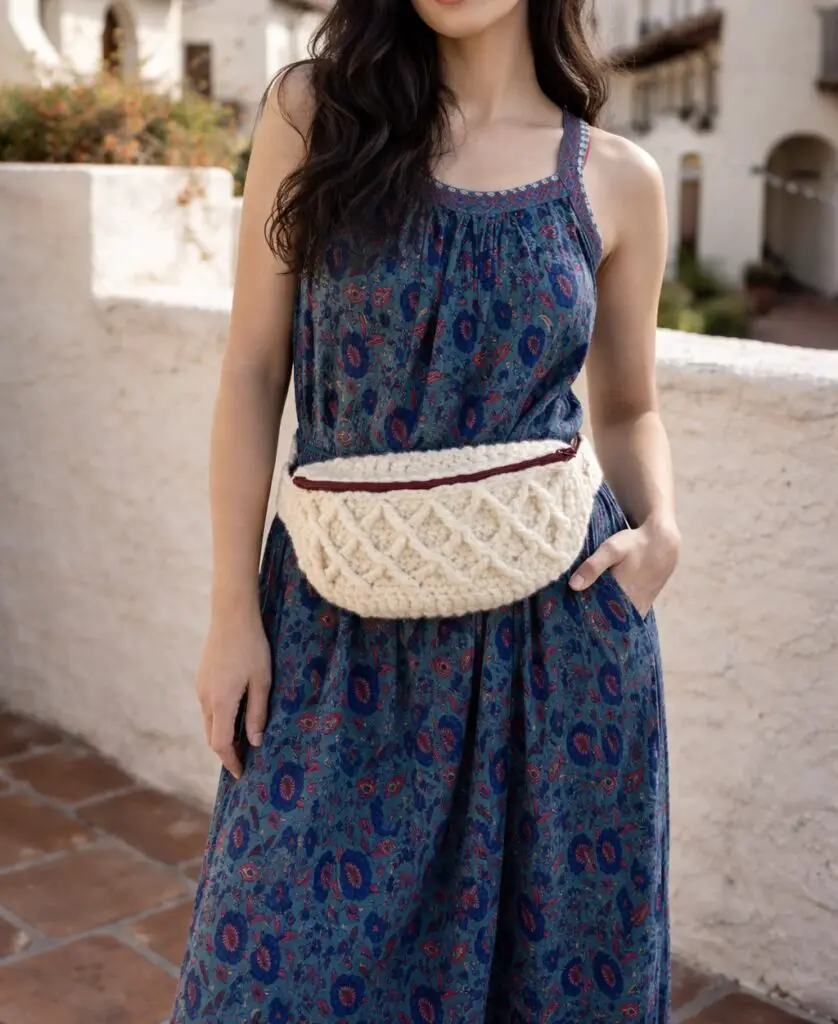
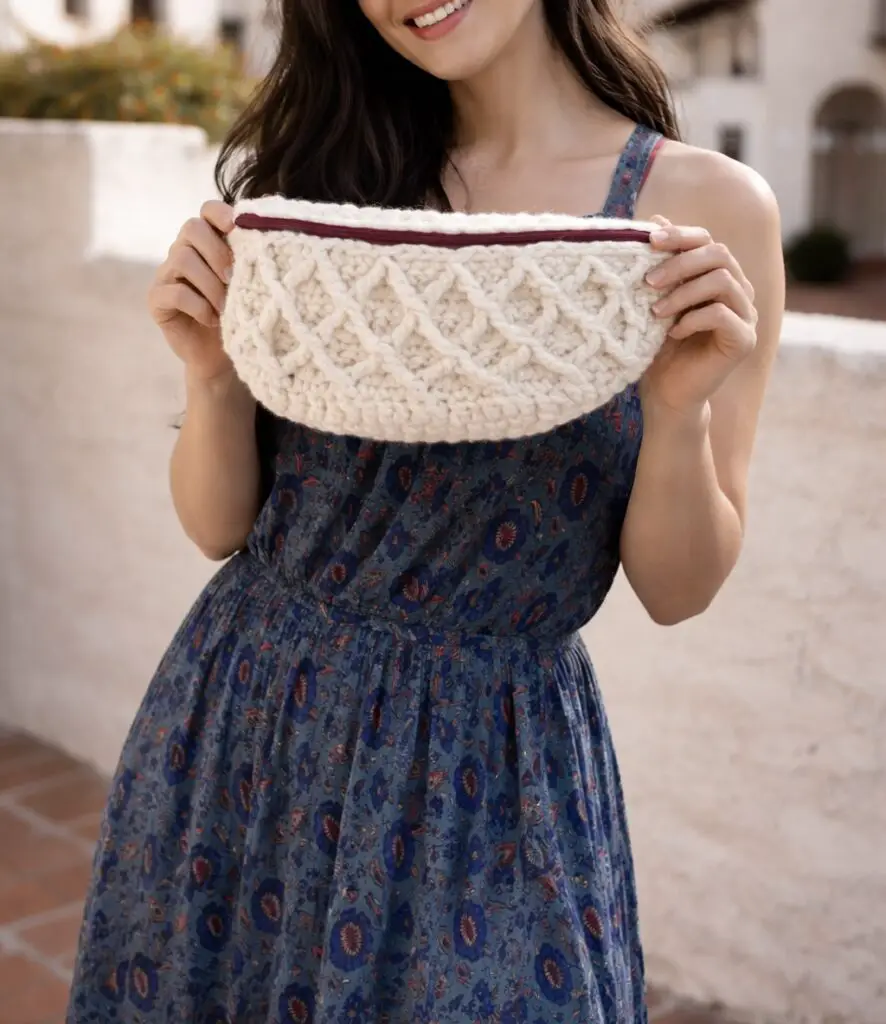
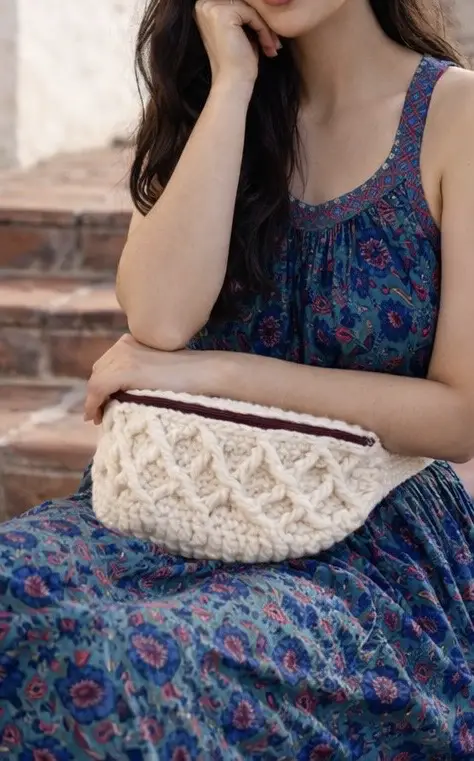
This crochet fanny pack is very lightweight and extremely soft. It’s made with only one skein of bulky yarn. You can wear as a fanny pack or shoulder cross bag. It’s a very versatile bag.
Whether you are new to crochet or an experienced crocheter, this bag will be fun to make and it’s very easy to make it.
The fanny pack is worked, started with crocheting a large round piece and front pouch piece is worked back and forth adding stitches in two corners in each row of the round piece, so it grew seamlessly.
Detailed written tutorial and the video tutorial are below.
Happy crochet!

Materials:
Yarn: https://amzn.to/41h3MKx
Metal buckle : https://amzn.to/47E0kNF
Crochet hook: https://amzn.to/4mbmY61
Swivel hook: https://amzn.to/47E1uJ1
Yarn needle and scissors
Abbreviations:
c: Magic circle
Ch: Chain
St (s(: Stitch (es)
Sc: Single crochet
Dc: Double crochet
Sl st: Slip stitch
Sm: Stitch marker
Fptr: Front post treble
Fptr2tog: Front post treble two together
Rsc: Reversed single crochet
Written Instructions:
Round 1: Make a mc and ch 2, 7 dc into the mc. (ch 2 counts as 1 st- so total of 8 dc)
Tighten the strand to close the mc and sl st to close the round.
Round 2: Ch 3, 1 dc to the same st (ch 3 counts as one st). Continue with 2 dc to each st around- 16 dc. Sl st to close the round.
Round 3: Ch 3, 1 dc to the same st. *1 dc to next st, 2 dc to next st. Repeat from * in the round. 24 dc. Sl st to close the round.
Round 4: Ch 3, 1 dc to the same st. *1 dc to next 2 sts, 2 dc to next st. Repeat from * in the round. 32 dc. Sl st to close the round.
Round 5: Ch 3, 1 dc to the same st. *1 dc to next 3 sts, 2 dc to next st. Repeat from * in the round. 40 dc. Sl st to close the round.
Round 6: Ch 3, 1 dc to the same st. *1 dc to next 4 sts, 2 dc to next st. Repeat from * in the round. 48 dc. Sl st to close the round.
Round 7: Ch 3, 1 dc to the same st. *1 dc to next 5 sts, 2 dc to next st. Repeat from * in the round. 56 dc. Sl st to close the round.
Round 8: Ch 3, 1 dc to the same st. *1 dc to next 6 sts, 2 dc to next st. Repeat from * in the round. 64 dc. Sl st to close the round. Fasten off at the end.
You final round piece should be 11 inches (28 cm)
Place 2 sms to the first st and the last st of 26 sts. We are going to work back and forth of these 26 sts.
Make a slip knot and attach the yarn.
Row 1: 1 sc to each st until the next marker. (26 sc) Sl st to next 2 sts.
Row 2: Turn your work, skip 2 sts, 1 dc to each st (26 double crochet) place a sm to the beginning dc st. Sl st to next 2 sts and turn your work.
Row 3: 1 fptr to the 3rd sc st on the previous row. Skip the first dc st, 1 sc to next 3 sts. 1 fptr2tog to the same sc (3rd sc) st on the previous row, then skip the next three sts from the previous row and place the second half of the fptr in the fourth st. Skip one st, 1 sc to next 3 sts.
1 fptr2tog to the same sc st on the previous row, then skip the next three sts from the previous row and place the second half of the fptr in the fourth st. Skip one st, 1 sc to next 3 sts.
Repeat this: 1 fptr2tog to the same sc st on the previous row, then skip the next three sts from the previous row and place the second half of the fptr in the fourth st. Skip one st, 1 sc to next 3 sts.
At the end of the row, 1 fptr to the same sc st on the previous row and skip one st, 1 sc to the last st. Sl st to next two sts and turn your work.
Row 4: Skip two sts and 1 dc to each st until the end of the row. 26 dc (place a sm to the first st.) Sl st to next two sts and turn your work.
Row 5: Skip 2 slip sts, 1 sc to next 2 sts (place a sm to the beginning stitch). 1 fptr2tog to first fptr on the previous row, then the second fptr on the previous row. Skip the next st on the back, 1 sc to next 3 sts.
Repeat this:1 fptr2tog to same fptr on the previous row, then the next fptr on the previous row. Skip the next st on the back, 1 sc to next 3 sts. At the end of this row, skip the next st and 1 sc to last 3 sts. Sl st to next two sts and turn your work.
Row 6: Skip two sts and 1 dc to each st until the end of the row. 26 dc (place a sm to the first st). Sl st to next two sts and turn your work.
Row 7 (Repeat row 3): Skip 2 slip stitches. 1 fptr to the first fptr on the previous row. Skip the next st, 1 sc to next 3 sts.1 fptr2tog to same fptr on the previous row, then the next fptr on the previous row. Repeat from * until the end of the row. At the end, 1 fptr to the last fptr on the previous row. Skip the next st, 1 sc to the last st. Sl st to next 2 sts and fasten off.
Making the handle (Row 1): make a slip knot and ch 7. Starting from the back bump of second ch, 1 sc to next back bump of 6 sts. 6 sc.
Row 2: Ch 3 and turn. 1 dc to each st. 6 dc.
Row 3: Ch 1 and turn. 1 fptr to the 3rd sc st on the previous row. Skip 1st dc, 1 sc to next 3 sts. 1 frptr to the 3rd sc st on the previous row. Skip next st 1 sc to the last st.
Row 4: Ch 3 and turn. 1 dc to each st. 6 dc.
Row 5: Ch 1 and turn. 1 sc to next 2 sts. 1 fptr2tog to first fptr on the previous row, then the next fptr on the previous row. Skip 2 sts. 1 sc to last 2 sts.
Row 6: Ch 3 and turn. 1 dc to each st. 6 dc.
Row 7: 1 fptr to the fptr on the previous row, skip one st, 1 sc to next 3 sts. 1 fptr to the same fptr on the previous row, skip one st. 1 sc to the last st.
Repeat rows 4 – 7 until the desired length.
Working around the handle: Ch 1, 1 rsc to each st around (all 4 sides).
Sew the zipper using tapestry needle with embroidery thread (place sms so the zipper stays in place).
Attach the metal buckle adjustable slide first and then sew the swivel snaphook.
Leave a Reply